Documentation for vectorization
This is the official documentation for how to use SVGConverter.
Using SVGConverter, you can convert your raster images to vector images, which are scalable and defined by geometry.
Throughout this guide, we will take the following image as an example to explain all the steps:

Layout of app
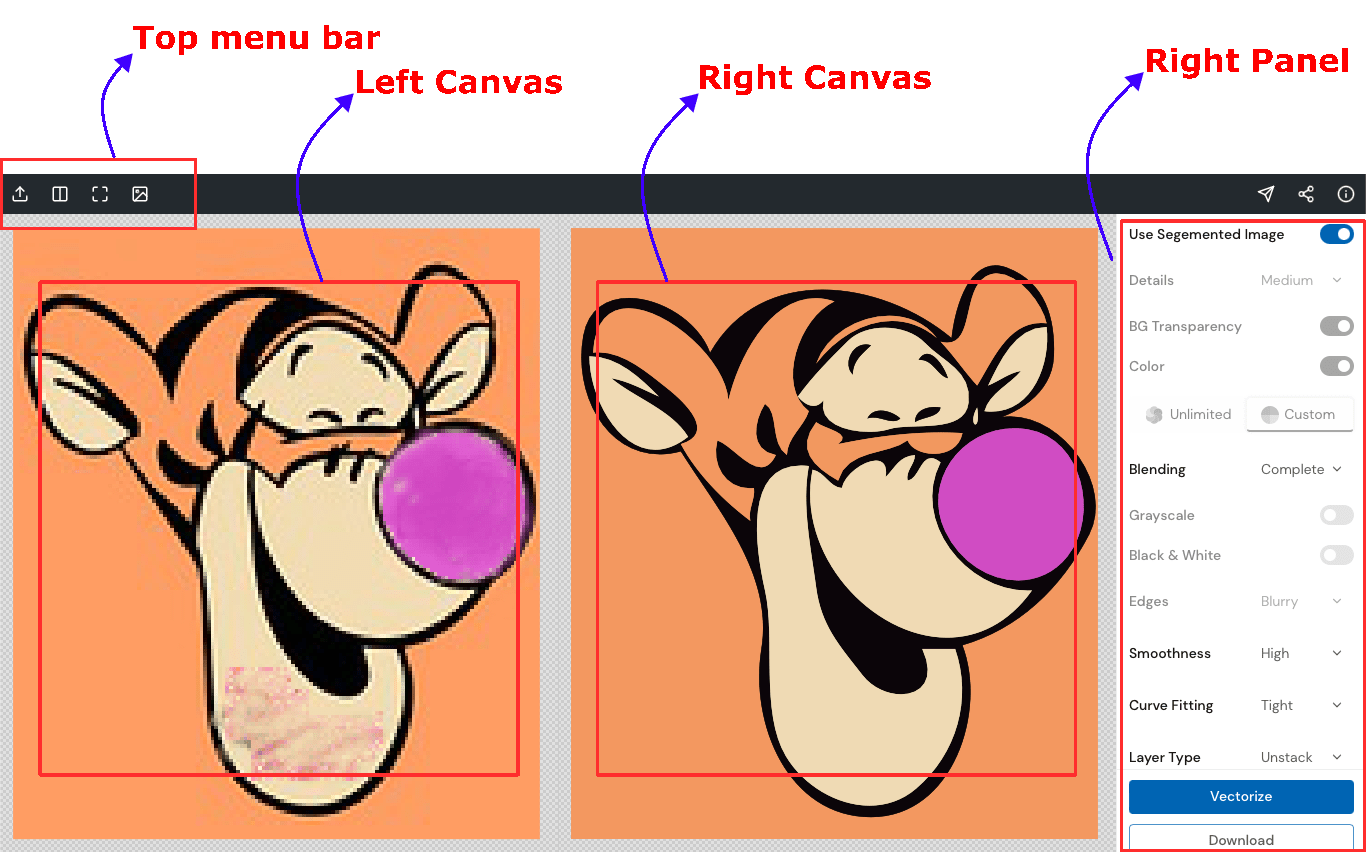
The layout of the software consists of four parts:
- Top menu bar
- Left canvas for your uploaded raster image
- Right canvas for the vectorized image
- The right panel contains various settings, which we will discuss one-by-one below.
Uploading image
You can upload an image by clicking the upload icon on the top menu bar. Or simply drag-drop an image. SVGConverter supports all common raster formats: PNG, JPG/JPEG, BMP, TIFF, WEBP, AVIF, and PDF.
Color/grayscale/black&white
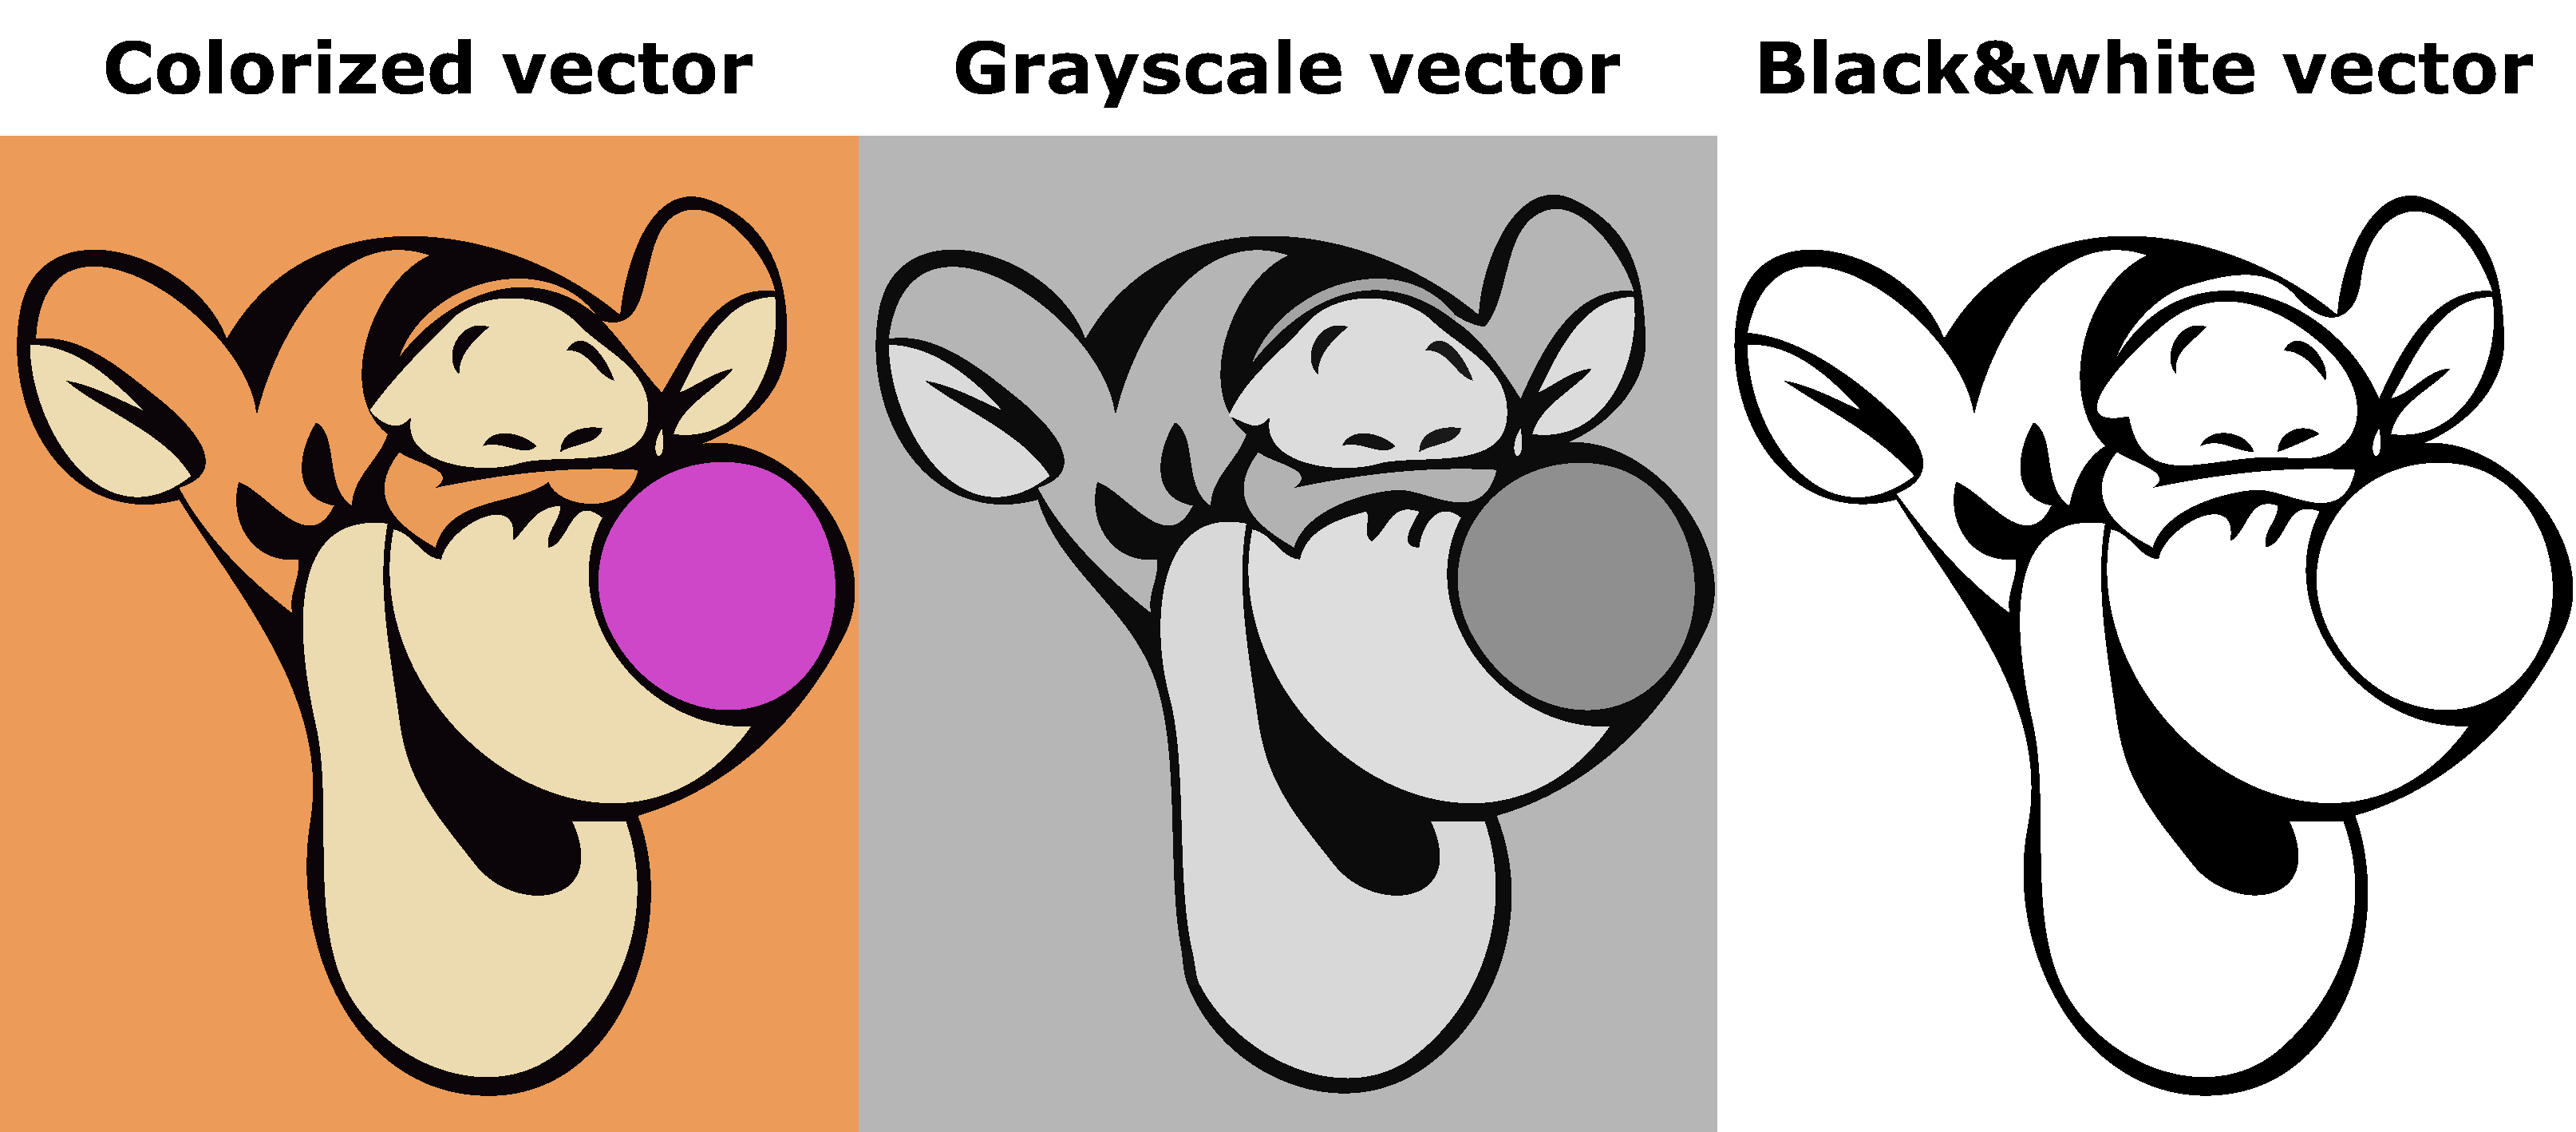
You can select one of them. Color gives you a colorized vector image. And similarly, grayscale and black & white will generate grayscale and black & white vectors.
Unlimited/Custom color
When "Unlimited" is selected, the number of colors in the vector image is automatically generated. It is useful for real-life photos and images where we have continuous transitions in colors between any two points in a raster image.
In images, like sketches, cartoons, and drawings, where colors are limited, selecting the "Custom" color option is appropriate.
Since our example is a cartoon with limited colors, we will select the "custom" option.
Clicking on the "custom" option will bring a pop-up. Here, you can create a custom color palette.
You can generate a color palette by entering the number of colors. Or you can also make a custom palette by picking each color from the image.
As shown in the above video, we have selected four colors from the images: orange (background), black (face's outlines), magenta (tiger's nose), and brownish-yellow (tiger's skin).
After creating a palette, click the save button and click the vectorize button to generate the vector.
Unlimited vs custom vector
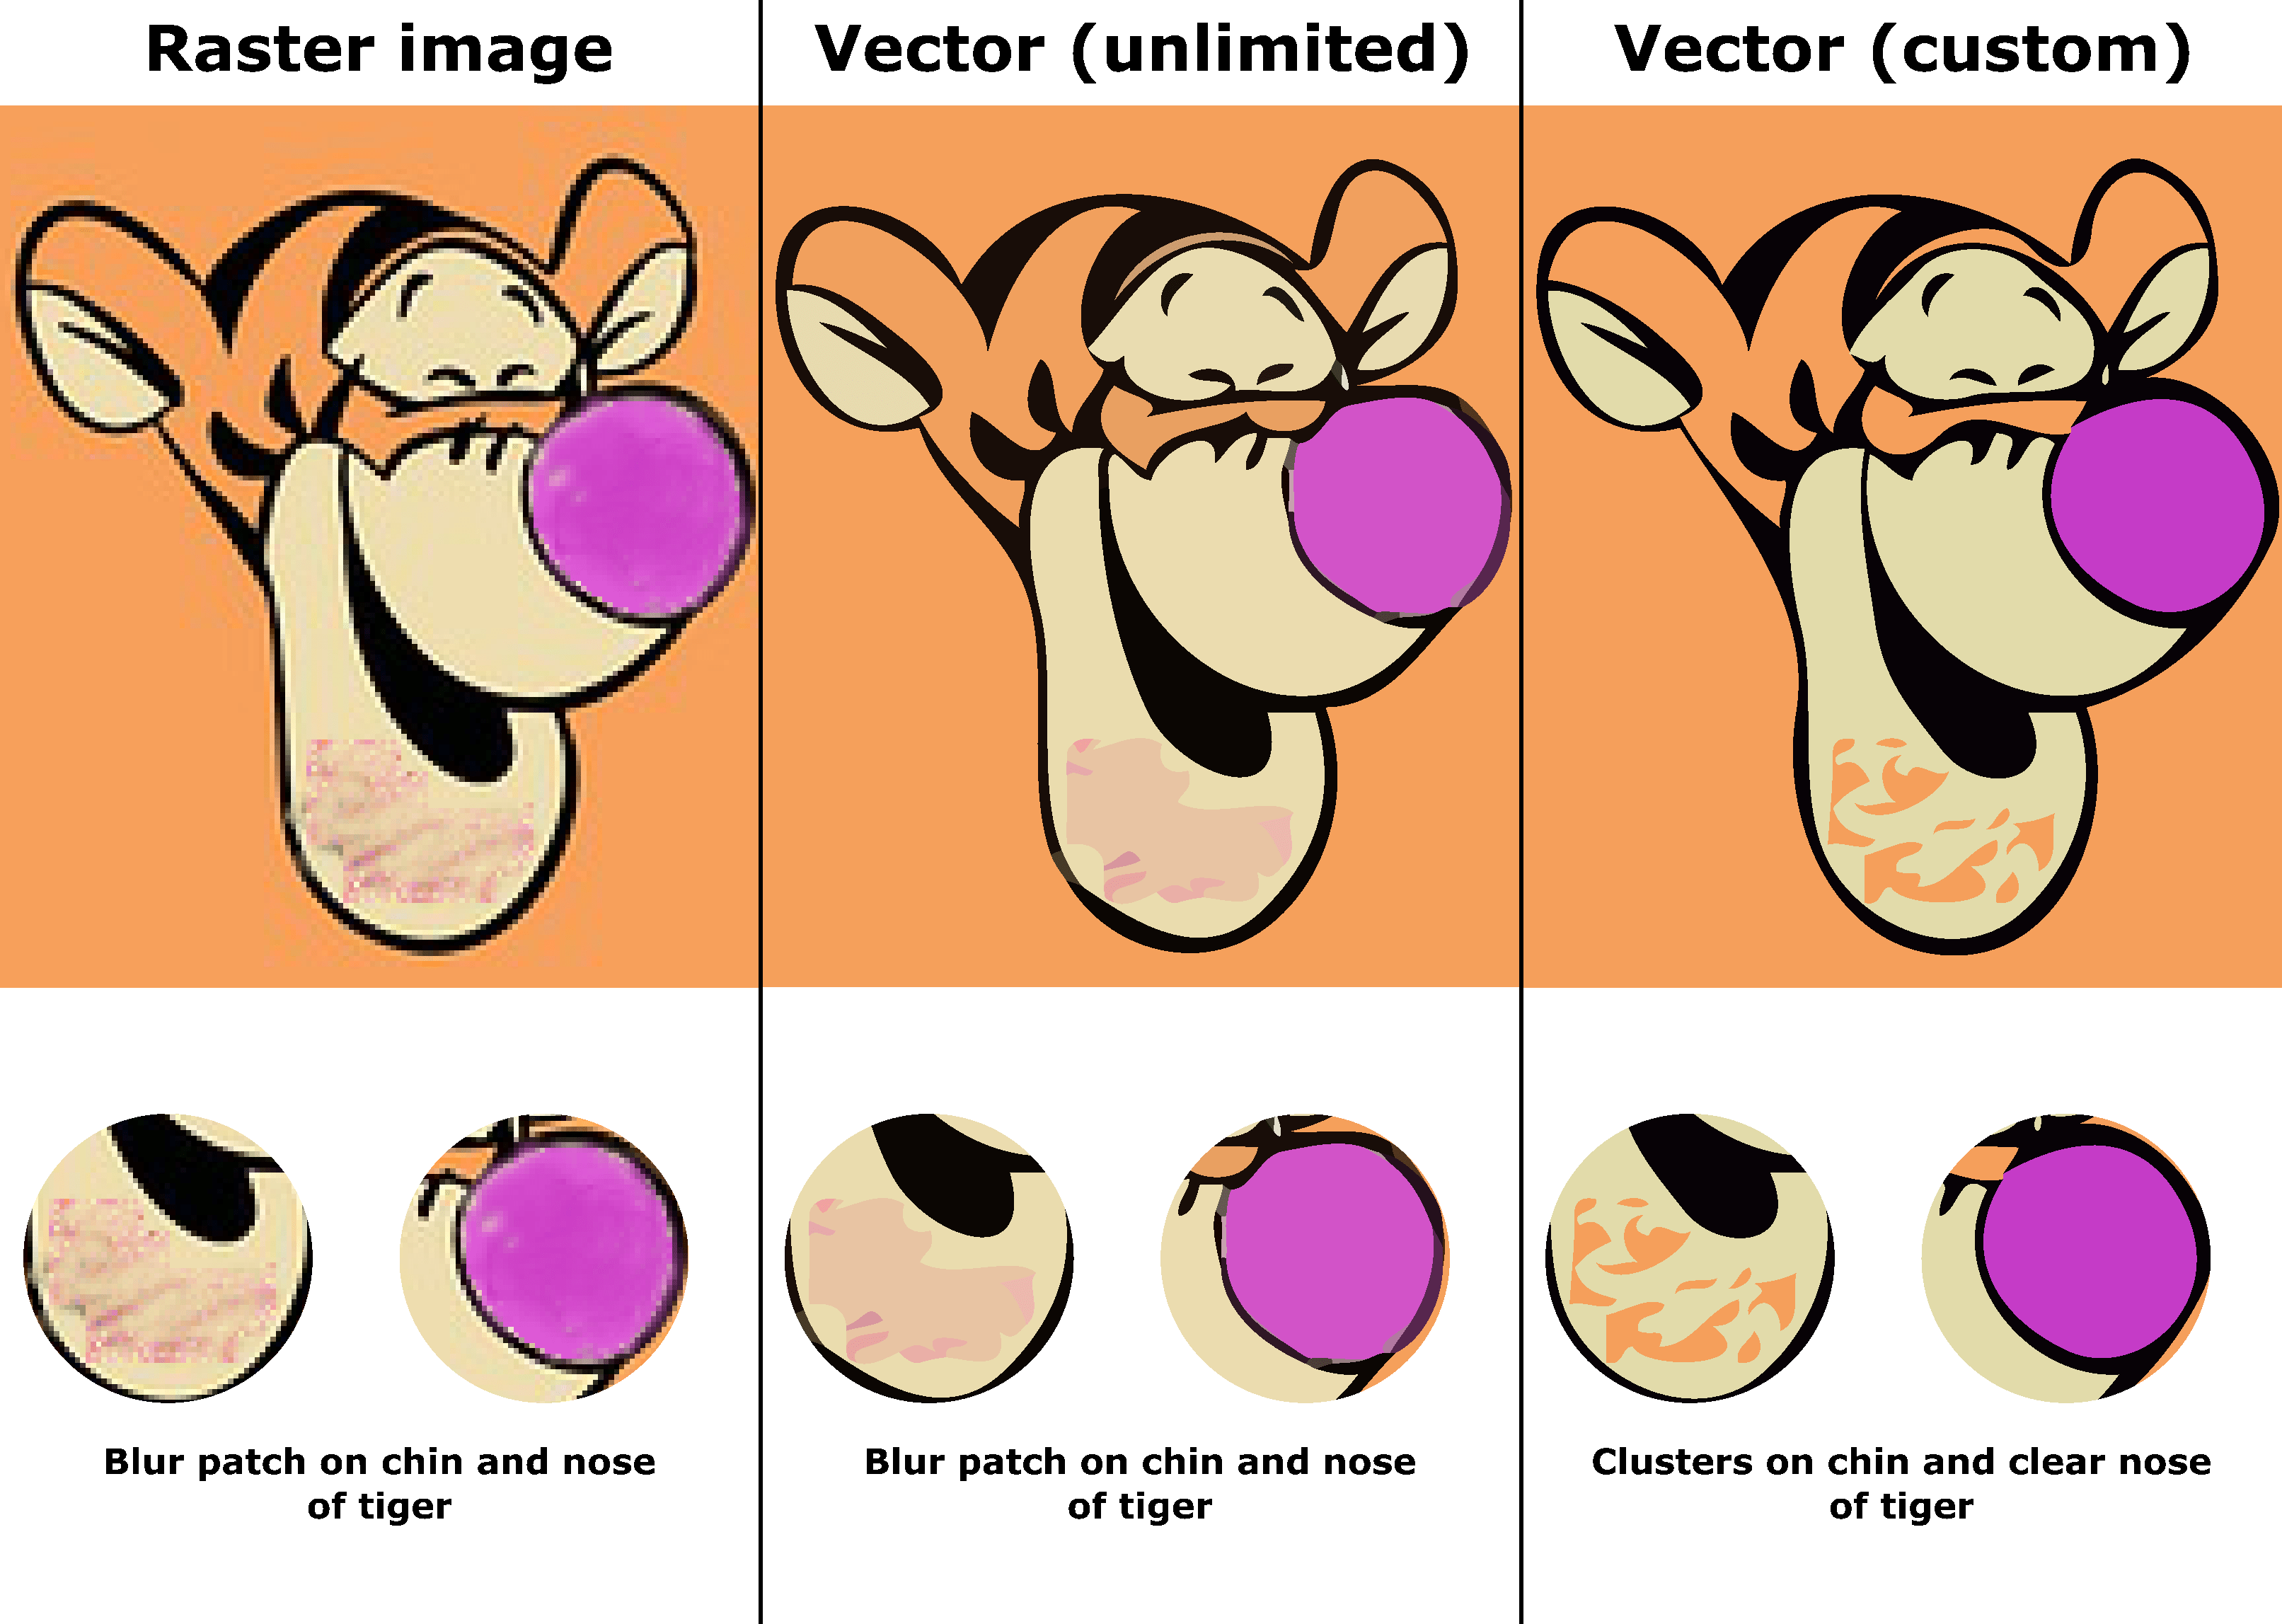
As we can see in the above image, the tiger's chin and nose has a blur patch in the raster image. And the same patch is reflected on the unlimited-color vector but not when the custom palette (4-color palette) is given.
Though the nose is clear in the custom, the patch on the chin is replaced by orange-color clusters. We will learn how to get rid of the clusters in the segmentation section of this docs.
The below example of a parrot is a real-life photo. So, in this case, the unlimited option will give a better result compared to custom.
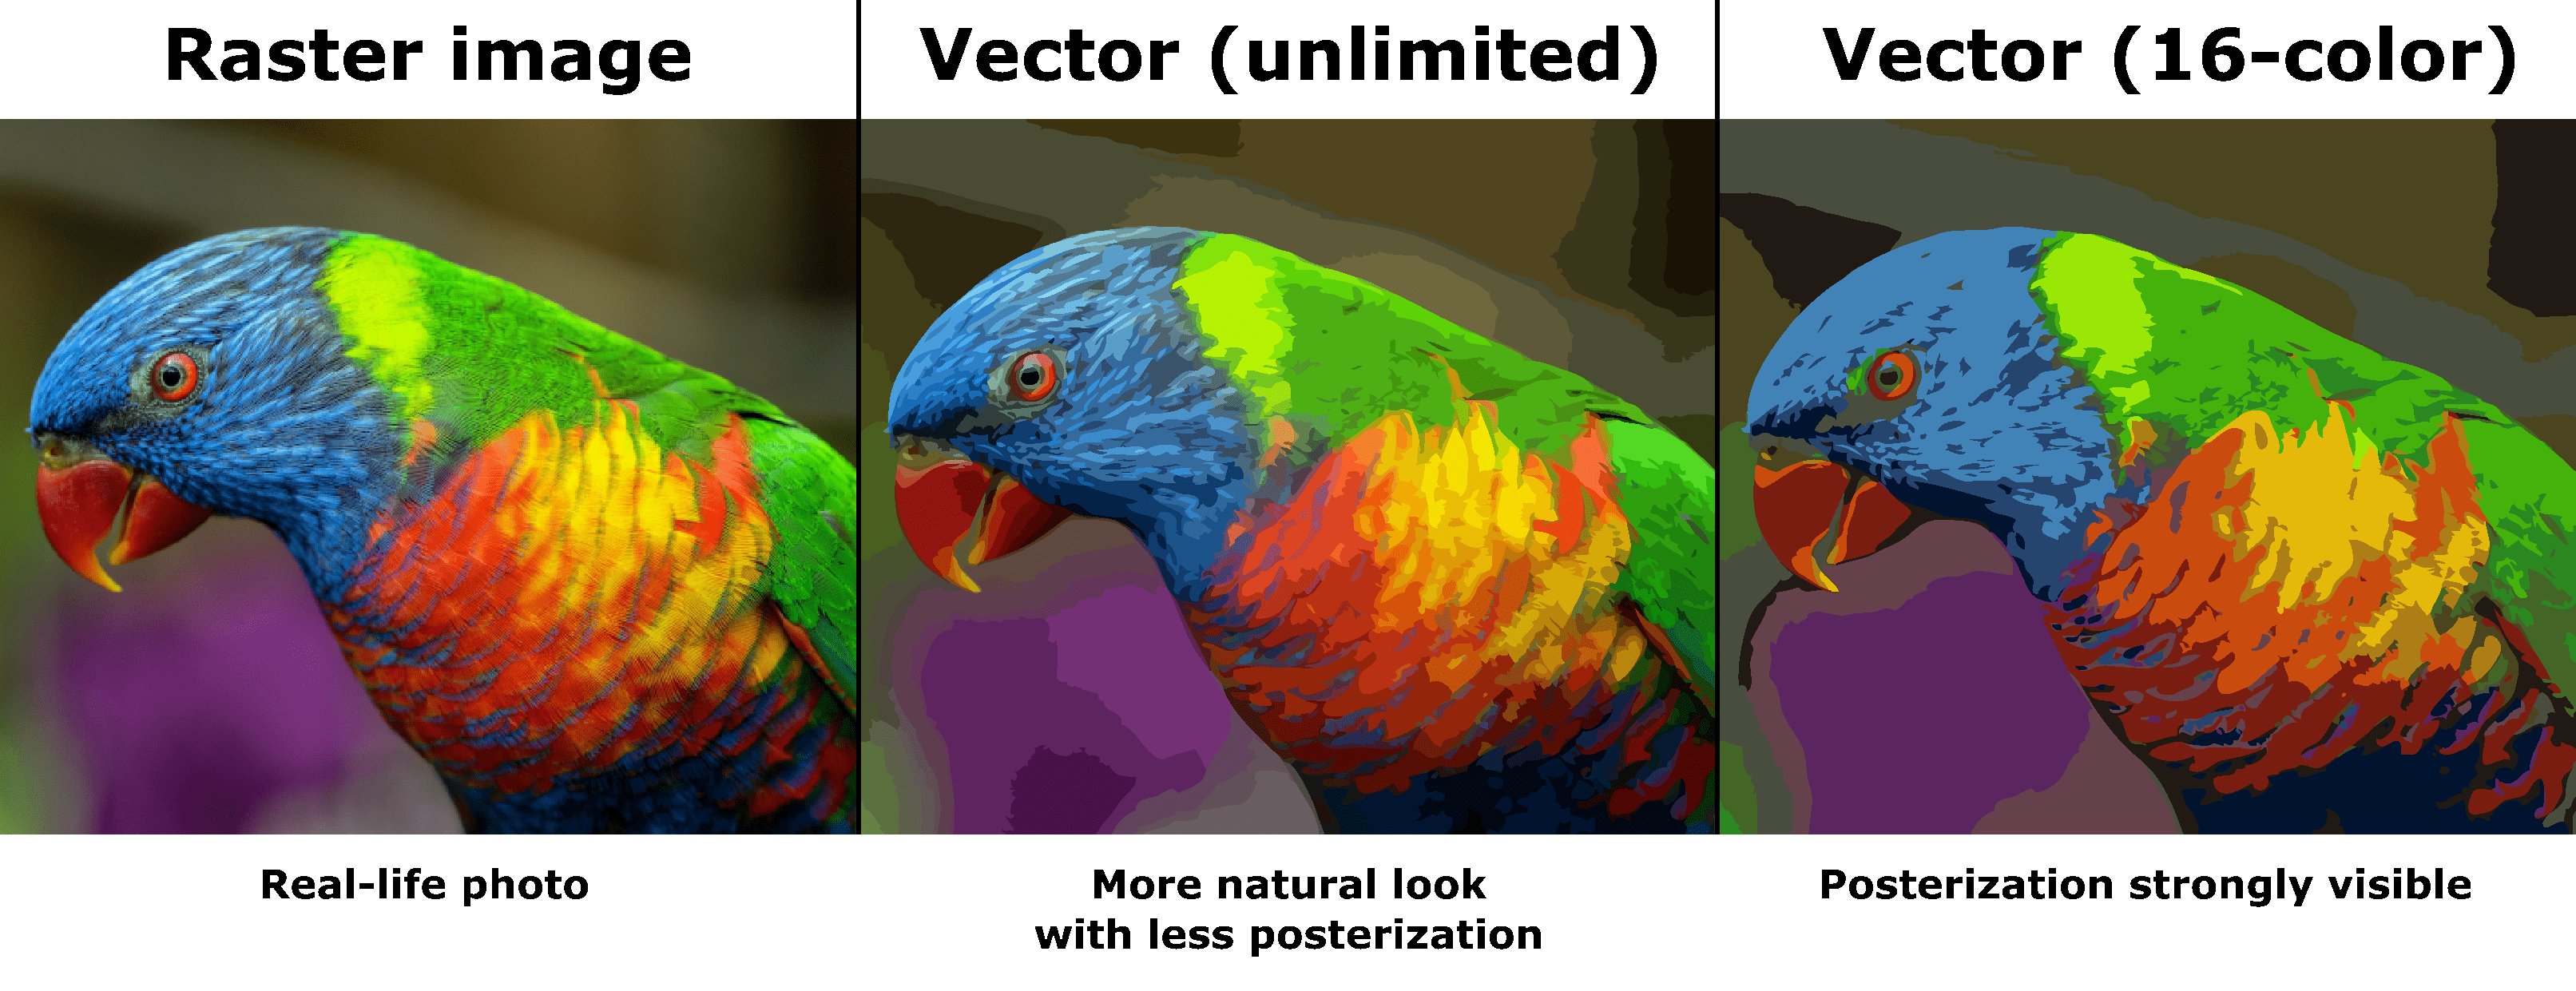
In the above example, we have chosen a 16-color palette to generate the vector image. And the posterization effects are strongly pronounced. That is not the case with the vector with unlimited colors, and thus it looks more natural.
Blending
When you select the "custom" color option, the "blending" option becomes visible. What is blending? Blending is the initial mixing of colors in the image before applying the custom color palette.
We can see the importance of blending in the below image.
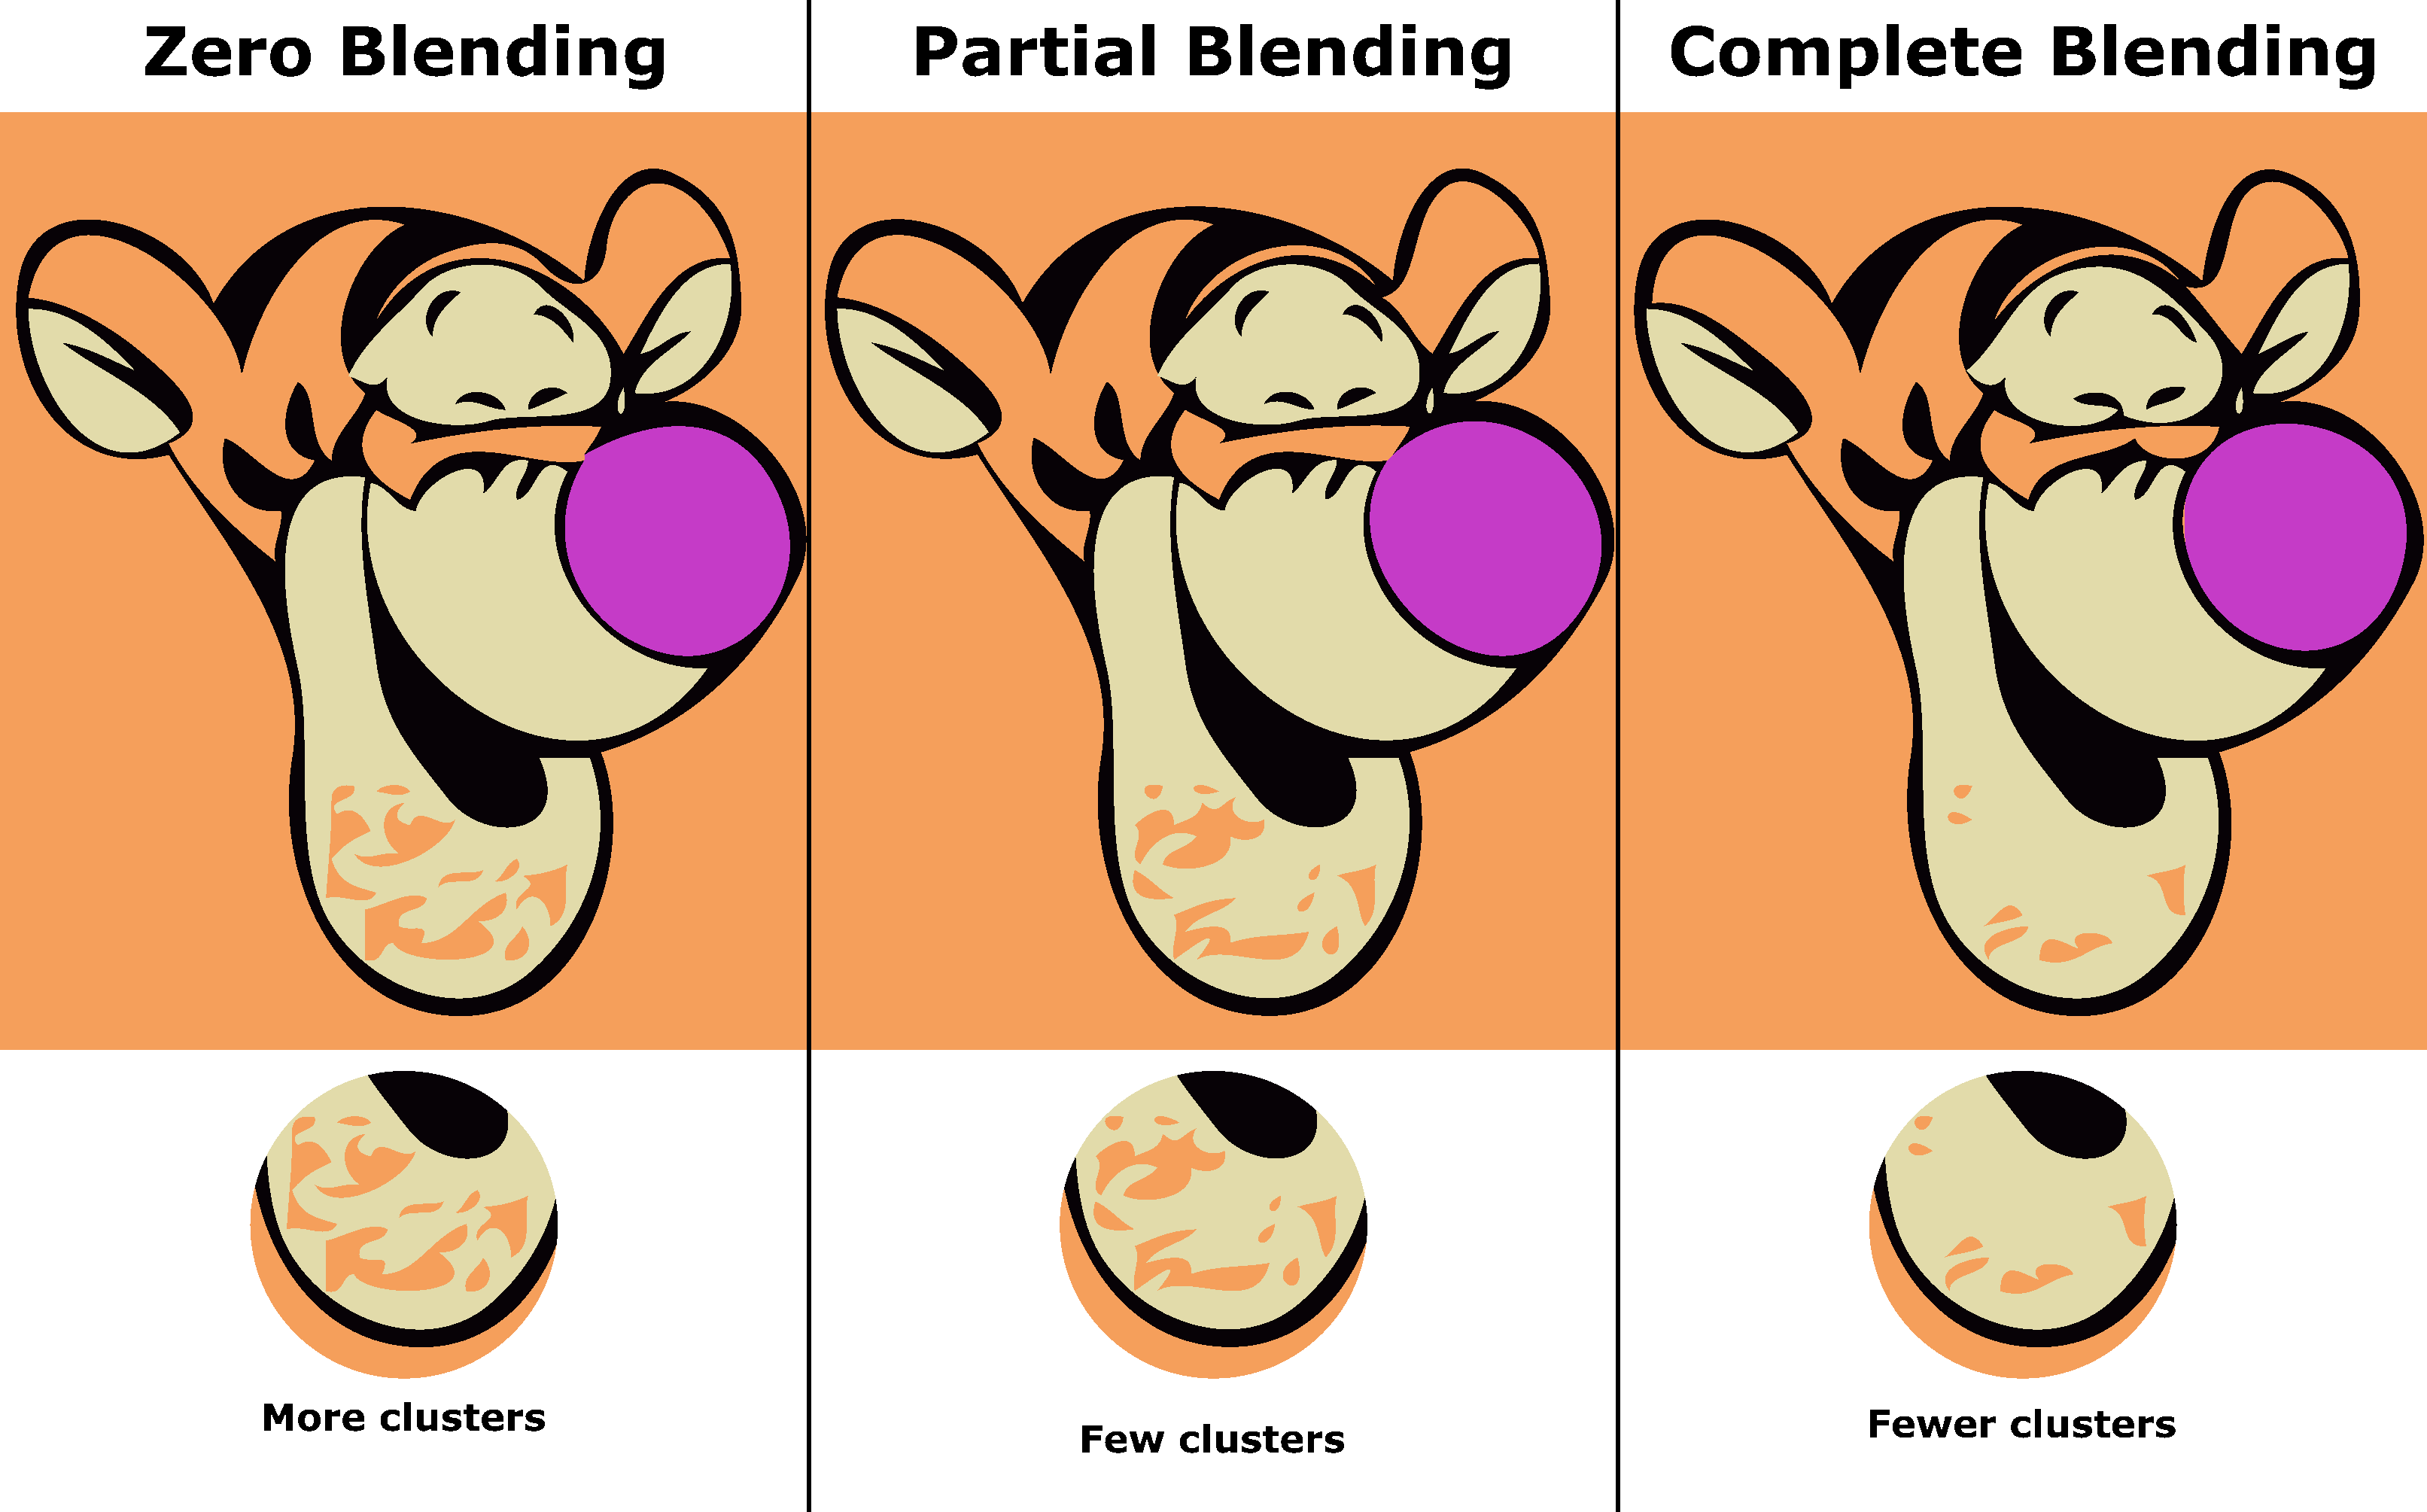
When "blending" is selected "zero", the vector has more noise on the tiger's chin, but when it is "complete", the noise reduces significantly. Thus, having non-zero blending is beneficial when the raster image has noise.
However, there are cases where selecting blending "zero" will give a better vector.
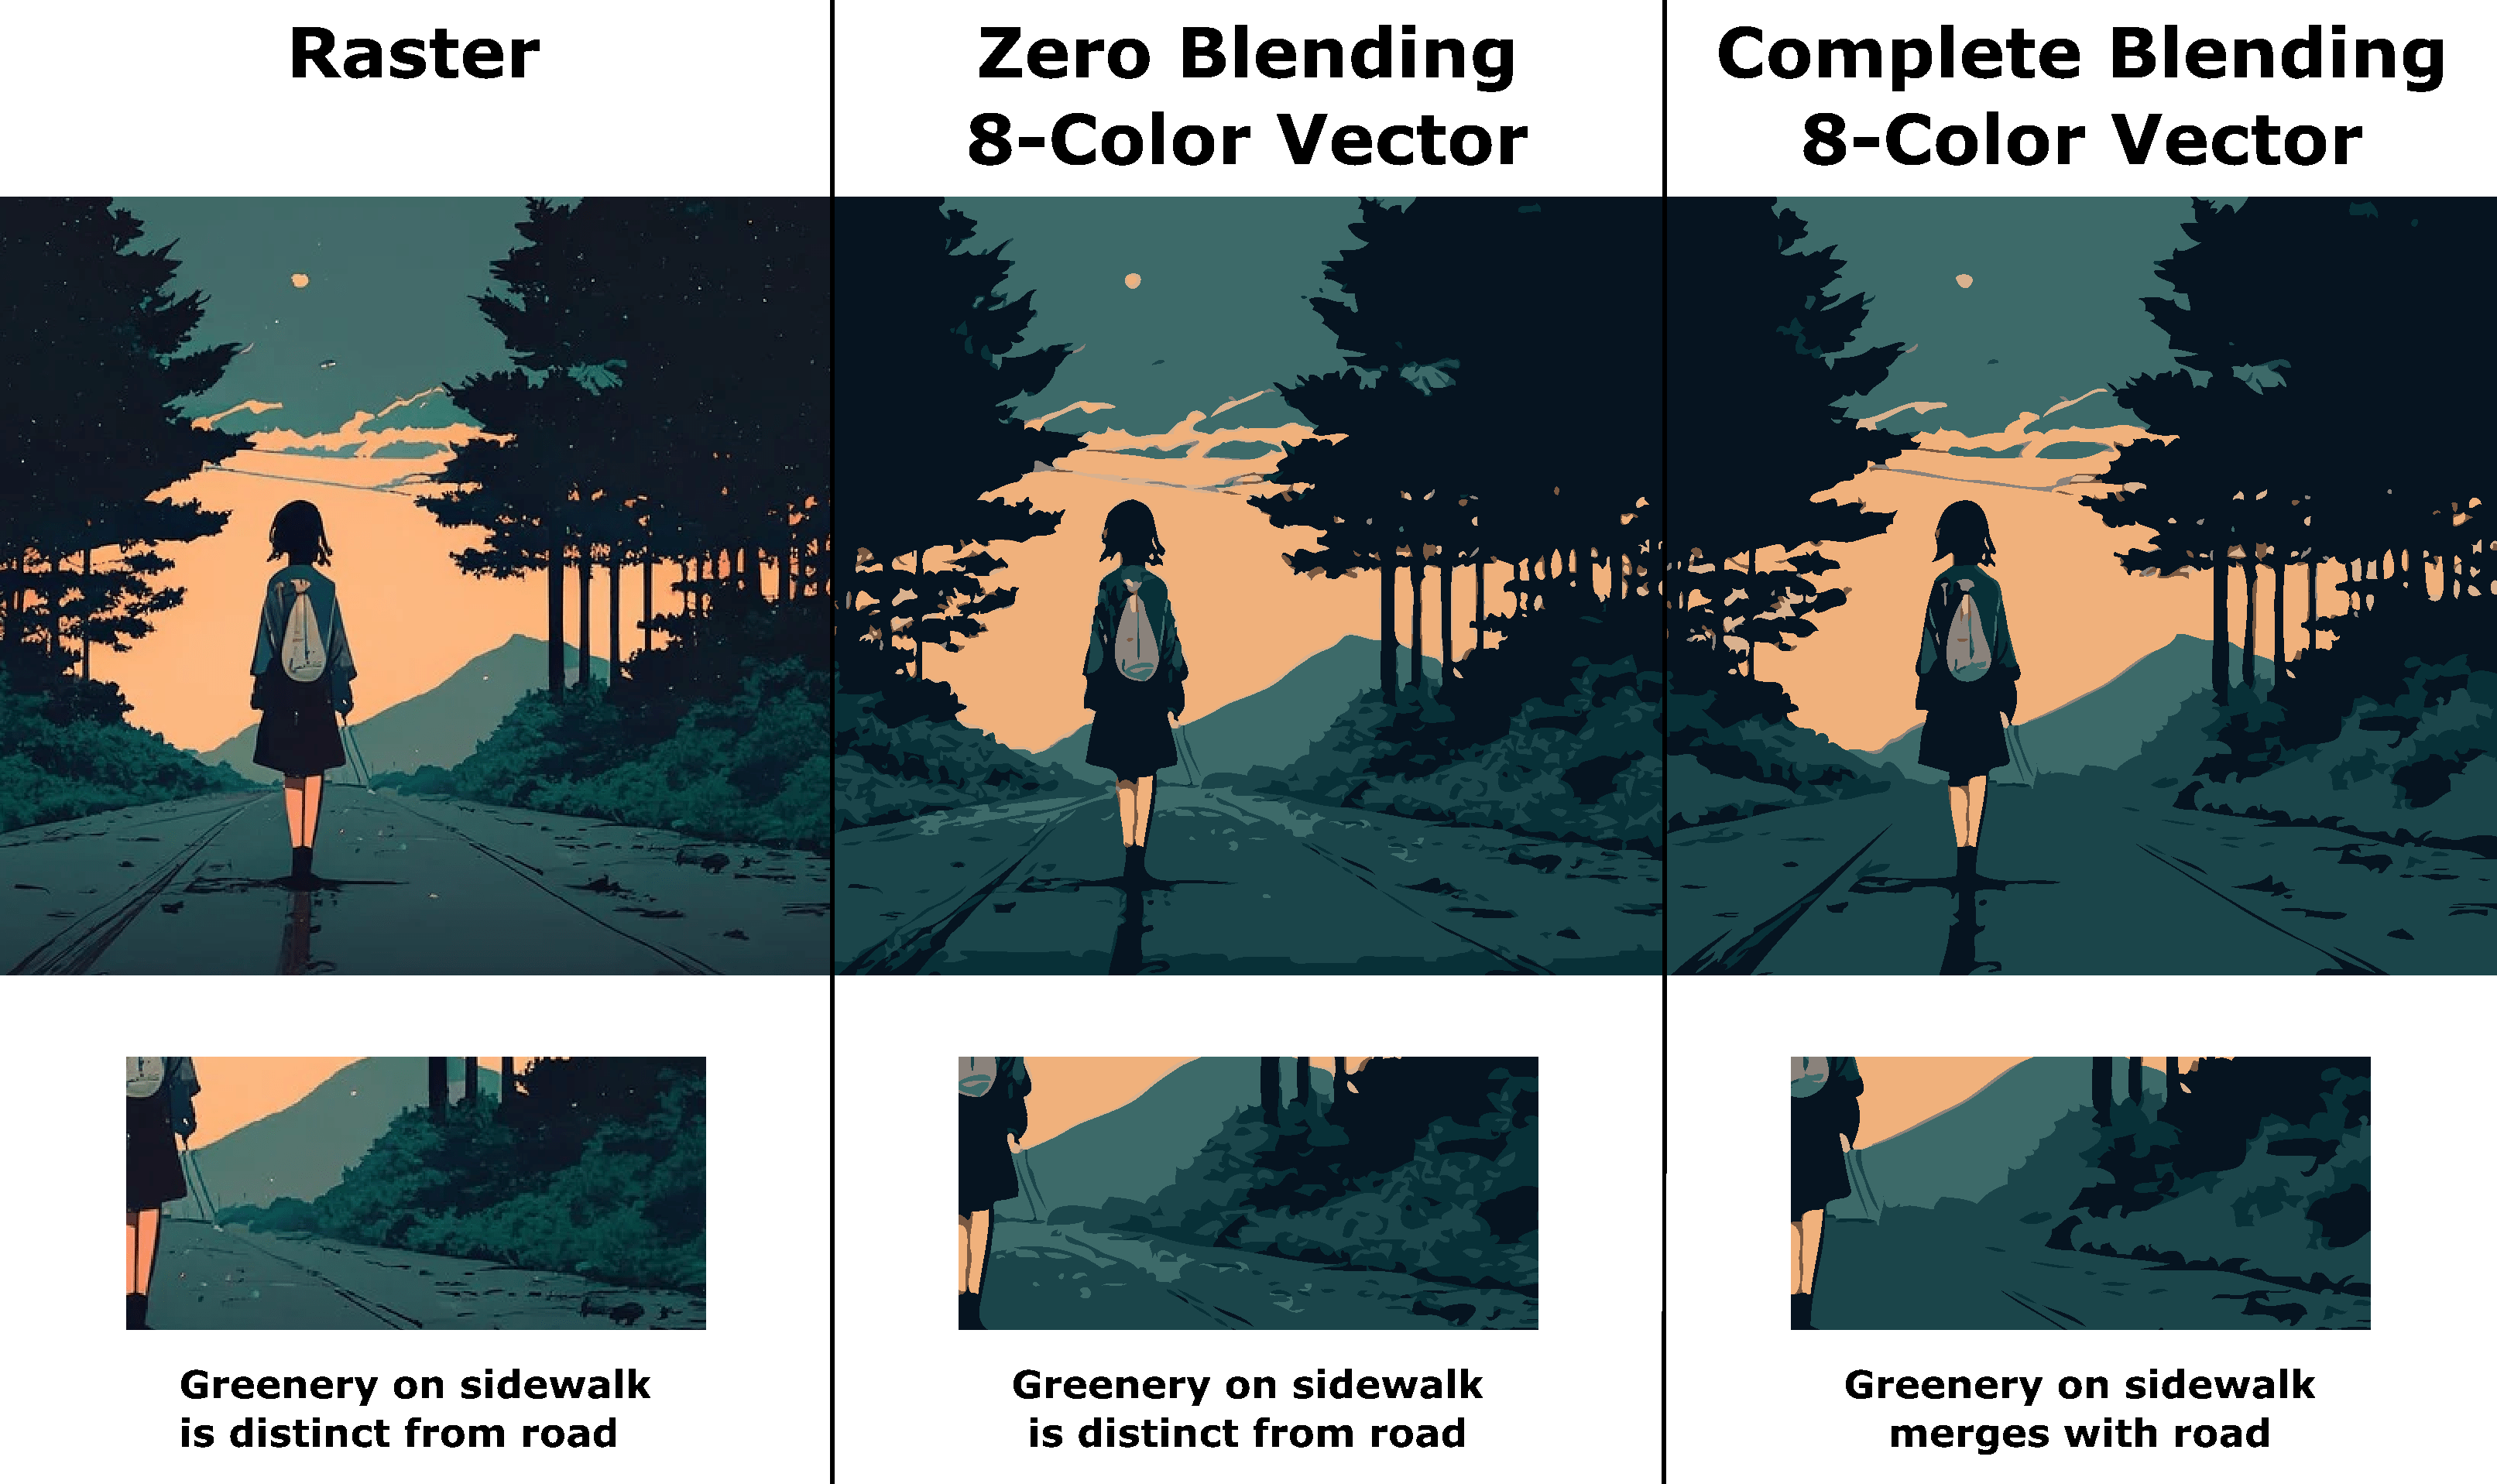
In the above example, "zero blending" produces much better results than "complete blending". The reason is the color of the road closely relates to the greenery on the sidewalk. Thus, when the "complete blending" is selected, both merge before the color palette is applied.
Editing segmented image
The segmented image is an intermediate result. You can change the final vector by editing the segmented image. You can merge, split, and fix shapes by editing the segmented image.
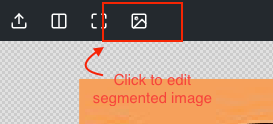
Click on the edit icon on the top menu bar to open the image editor.
The image editor offers sufficient functionalities to edit the image

- Revisions store the previous intermediate results. You can move back and forth to any revision. And edit the image.
- You can switch between the image and vector using the swap icon.
- The pan (hand) icon is for moving around the image.
- Bucket fill to fill the entire shape with picked color.
- Pencil allows you to do pixel-level edits. You can use this to fix minor changes or split the shape.
- Color picker to pick the color.
- "Ctrl" + "Z" and "Ctrl" + "Y" to undo and redo.
The video shows how to use these functionalities to eliminate the noise on the tiger's chin and do minor fixes.
Changing color of elements
The video below explains how to change the color of any shape with the bucket fill. We have changed the tiger's nose to red and the background to purple.
Splitting and adding elements
You can divide the existing and add another shape to the vector using the pencil and bucket fill—see the below video. We have added the beard to the tiger's chin.
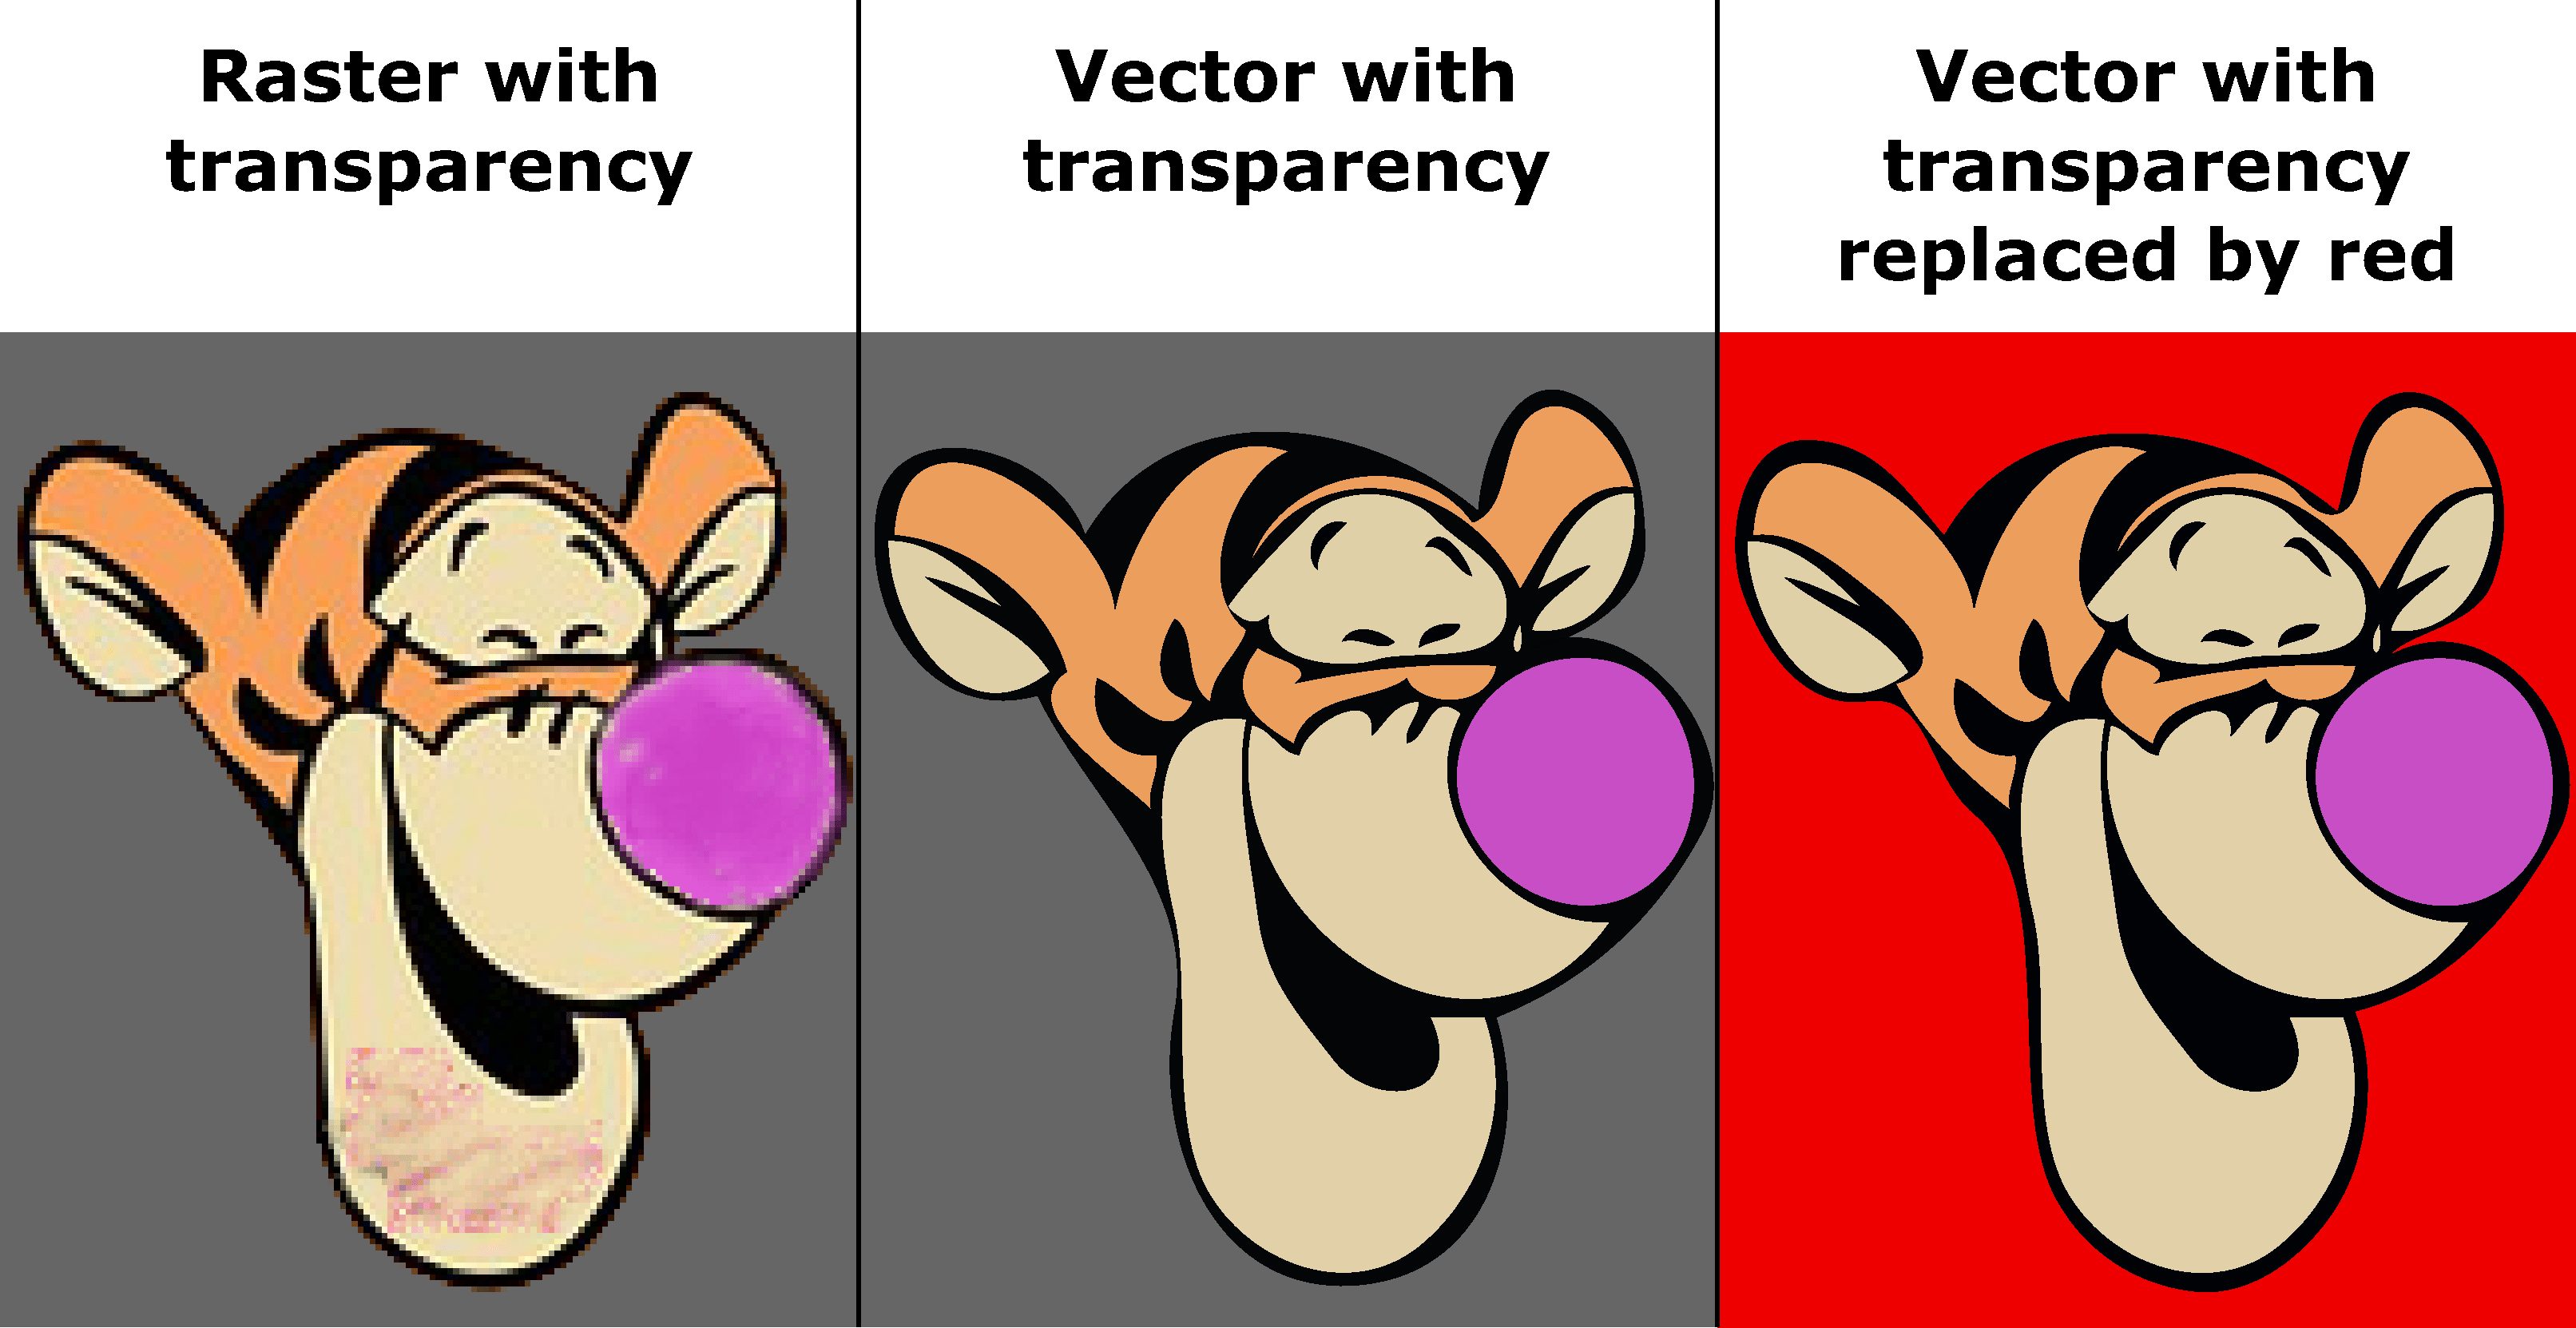
Transparency
SVGConverter also supports transparency. The transparency of the image can be retained in the vector. Or you can also replace the transparency with another color.
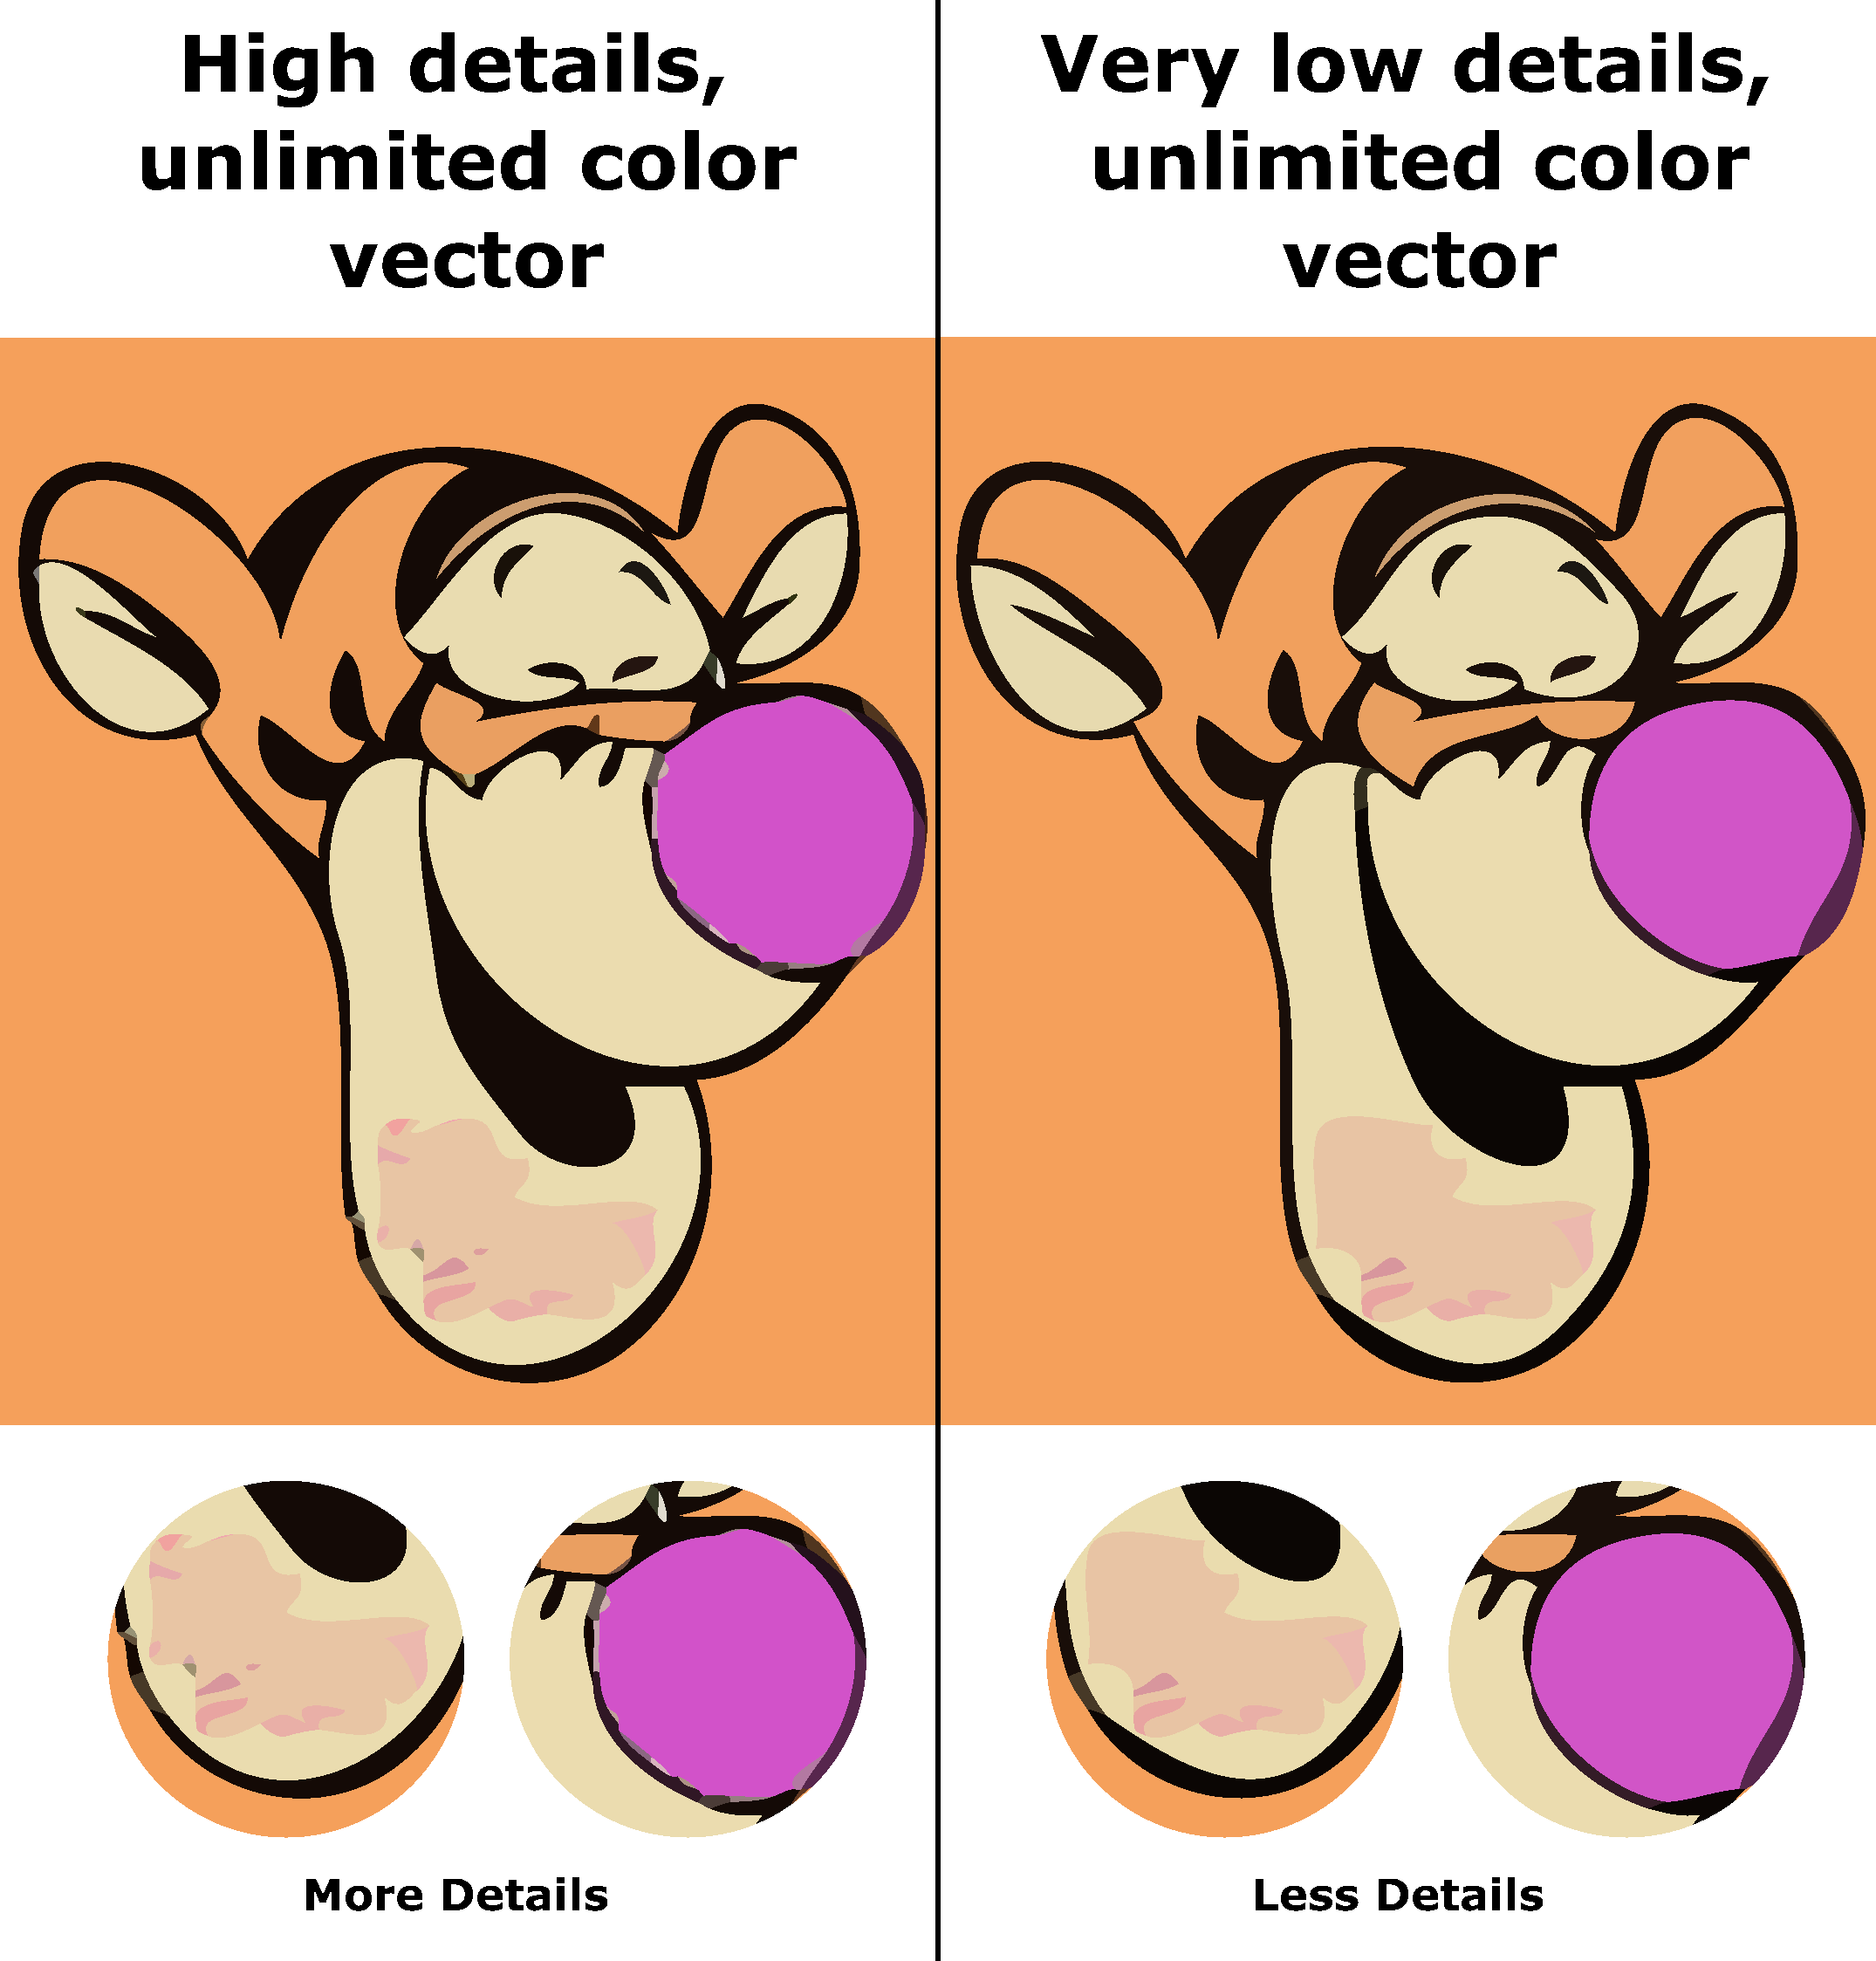
Details
The "details" option allows you to control smaller elements in the image. When it is selected "high", the output vector will retain many small elements from the input raster image, which may also include noise.
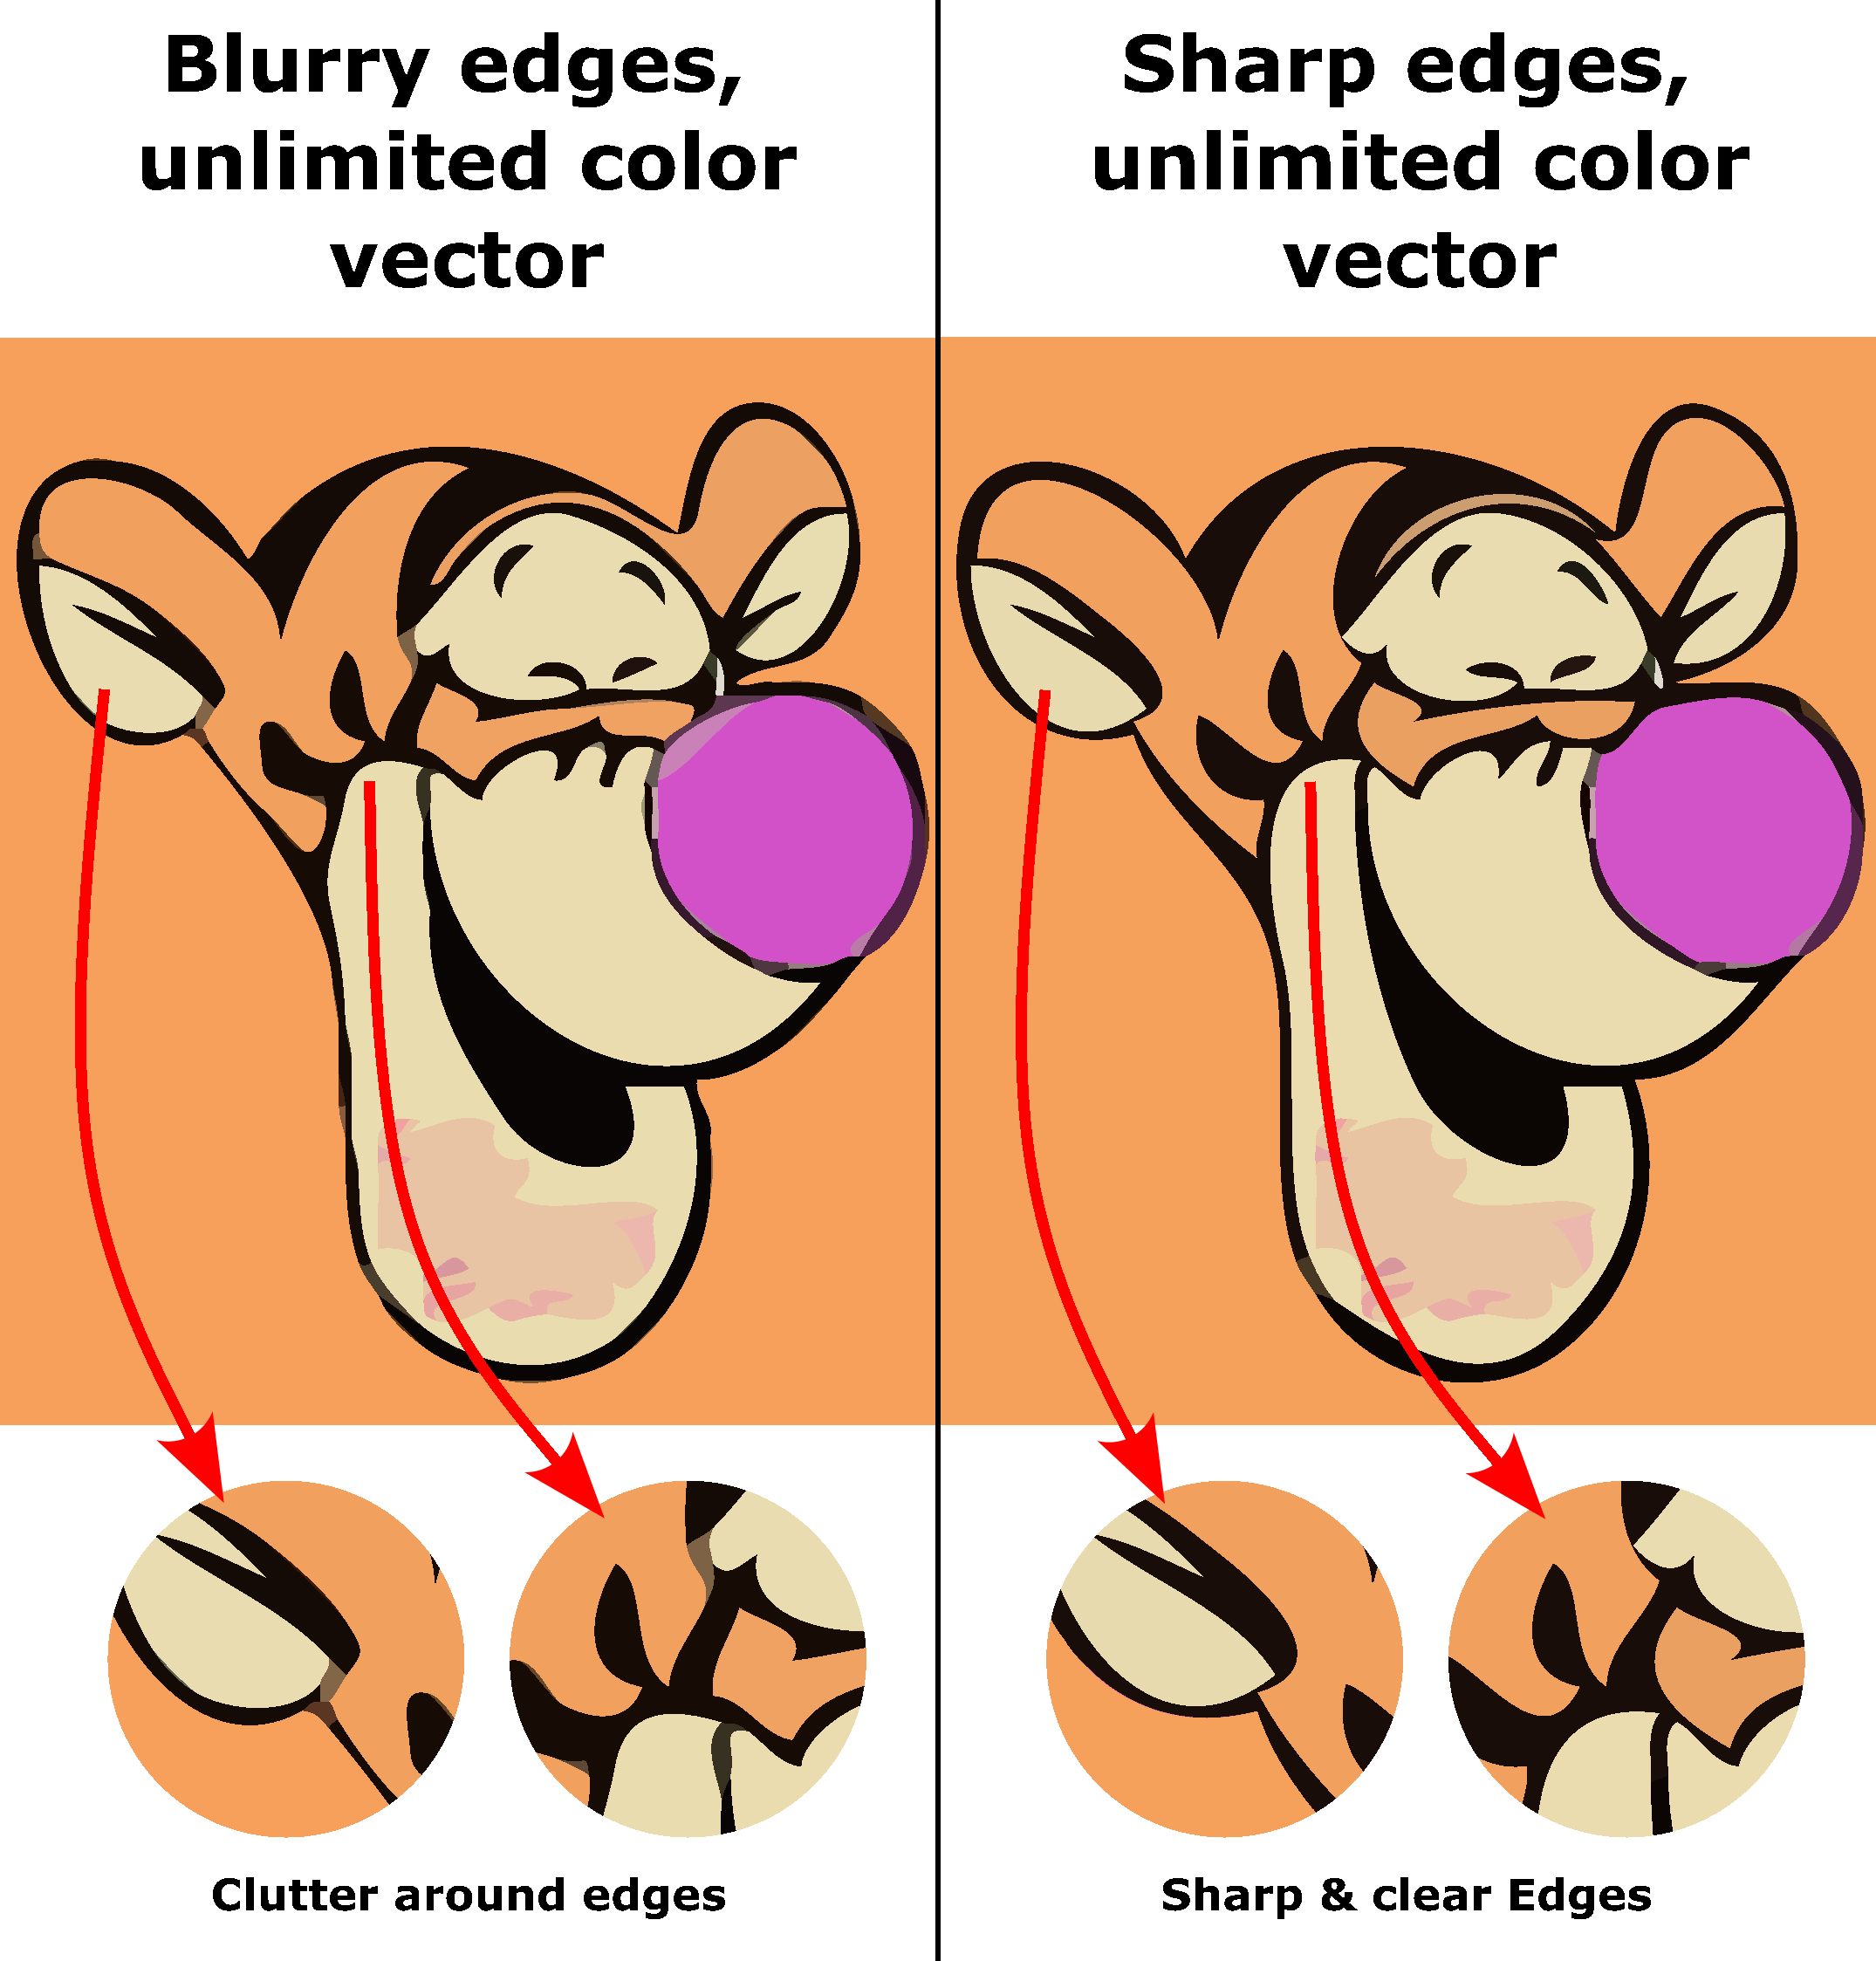
Edges
When sharp edges are selected, the cluster around the edges is removed.
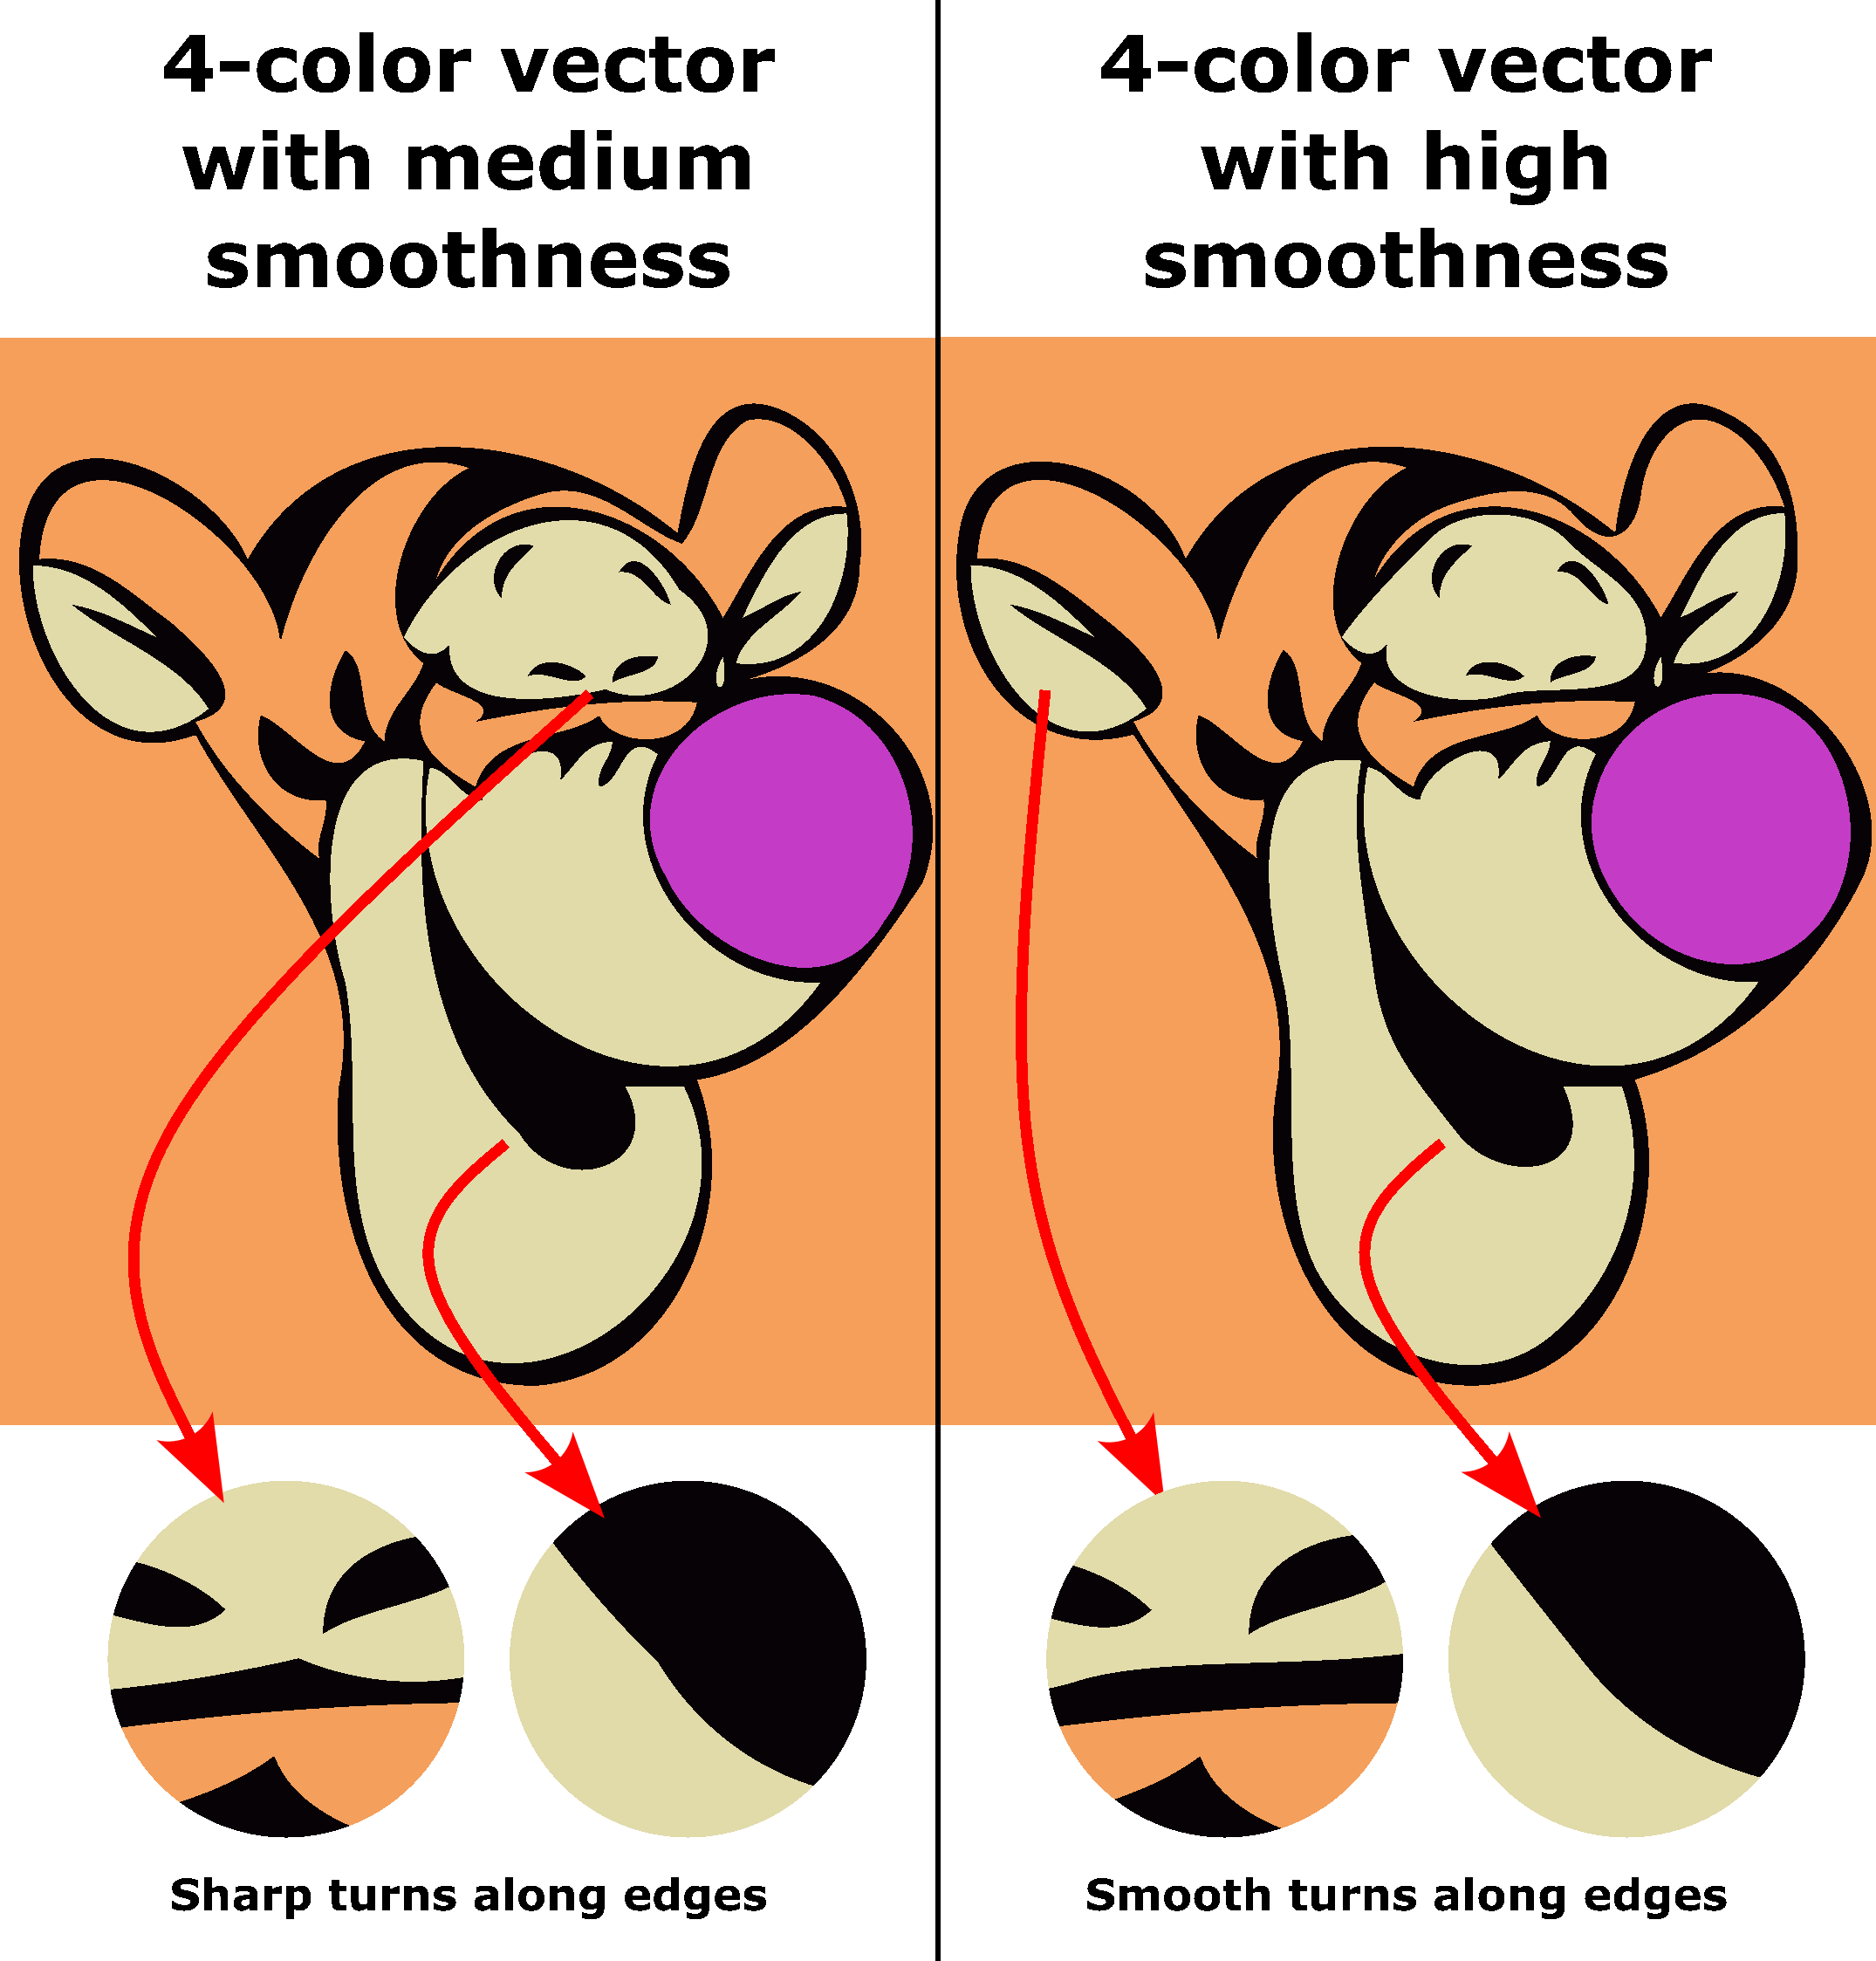
Smoothness
Smoothness controls how curves turn. The difference is subtle most of the time.
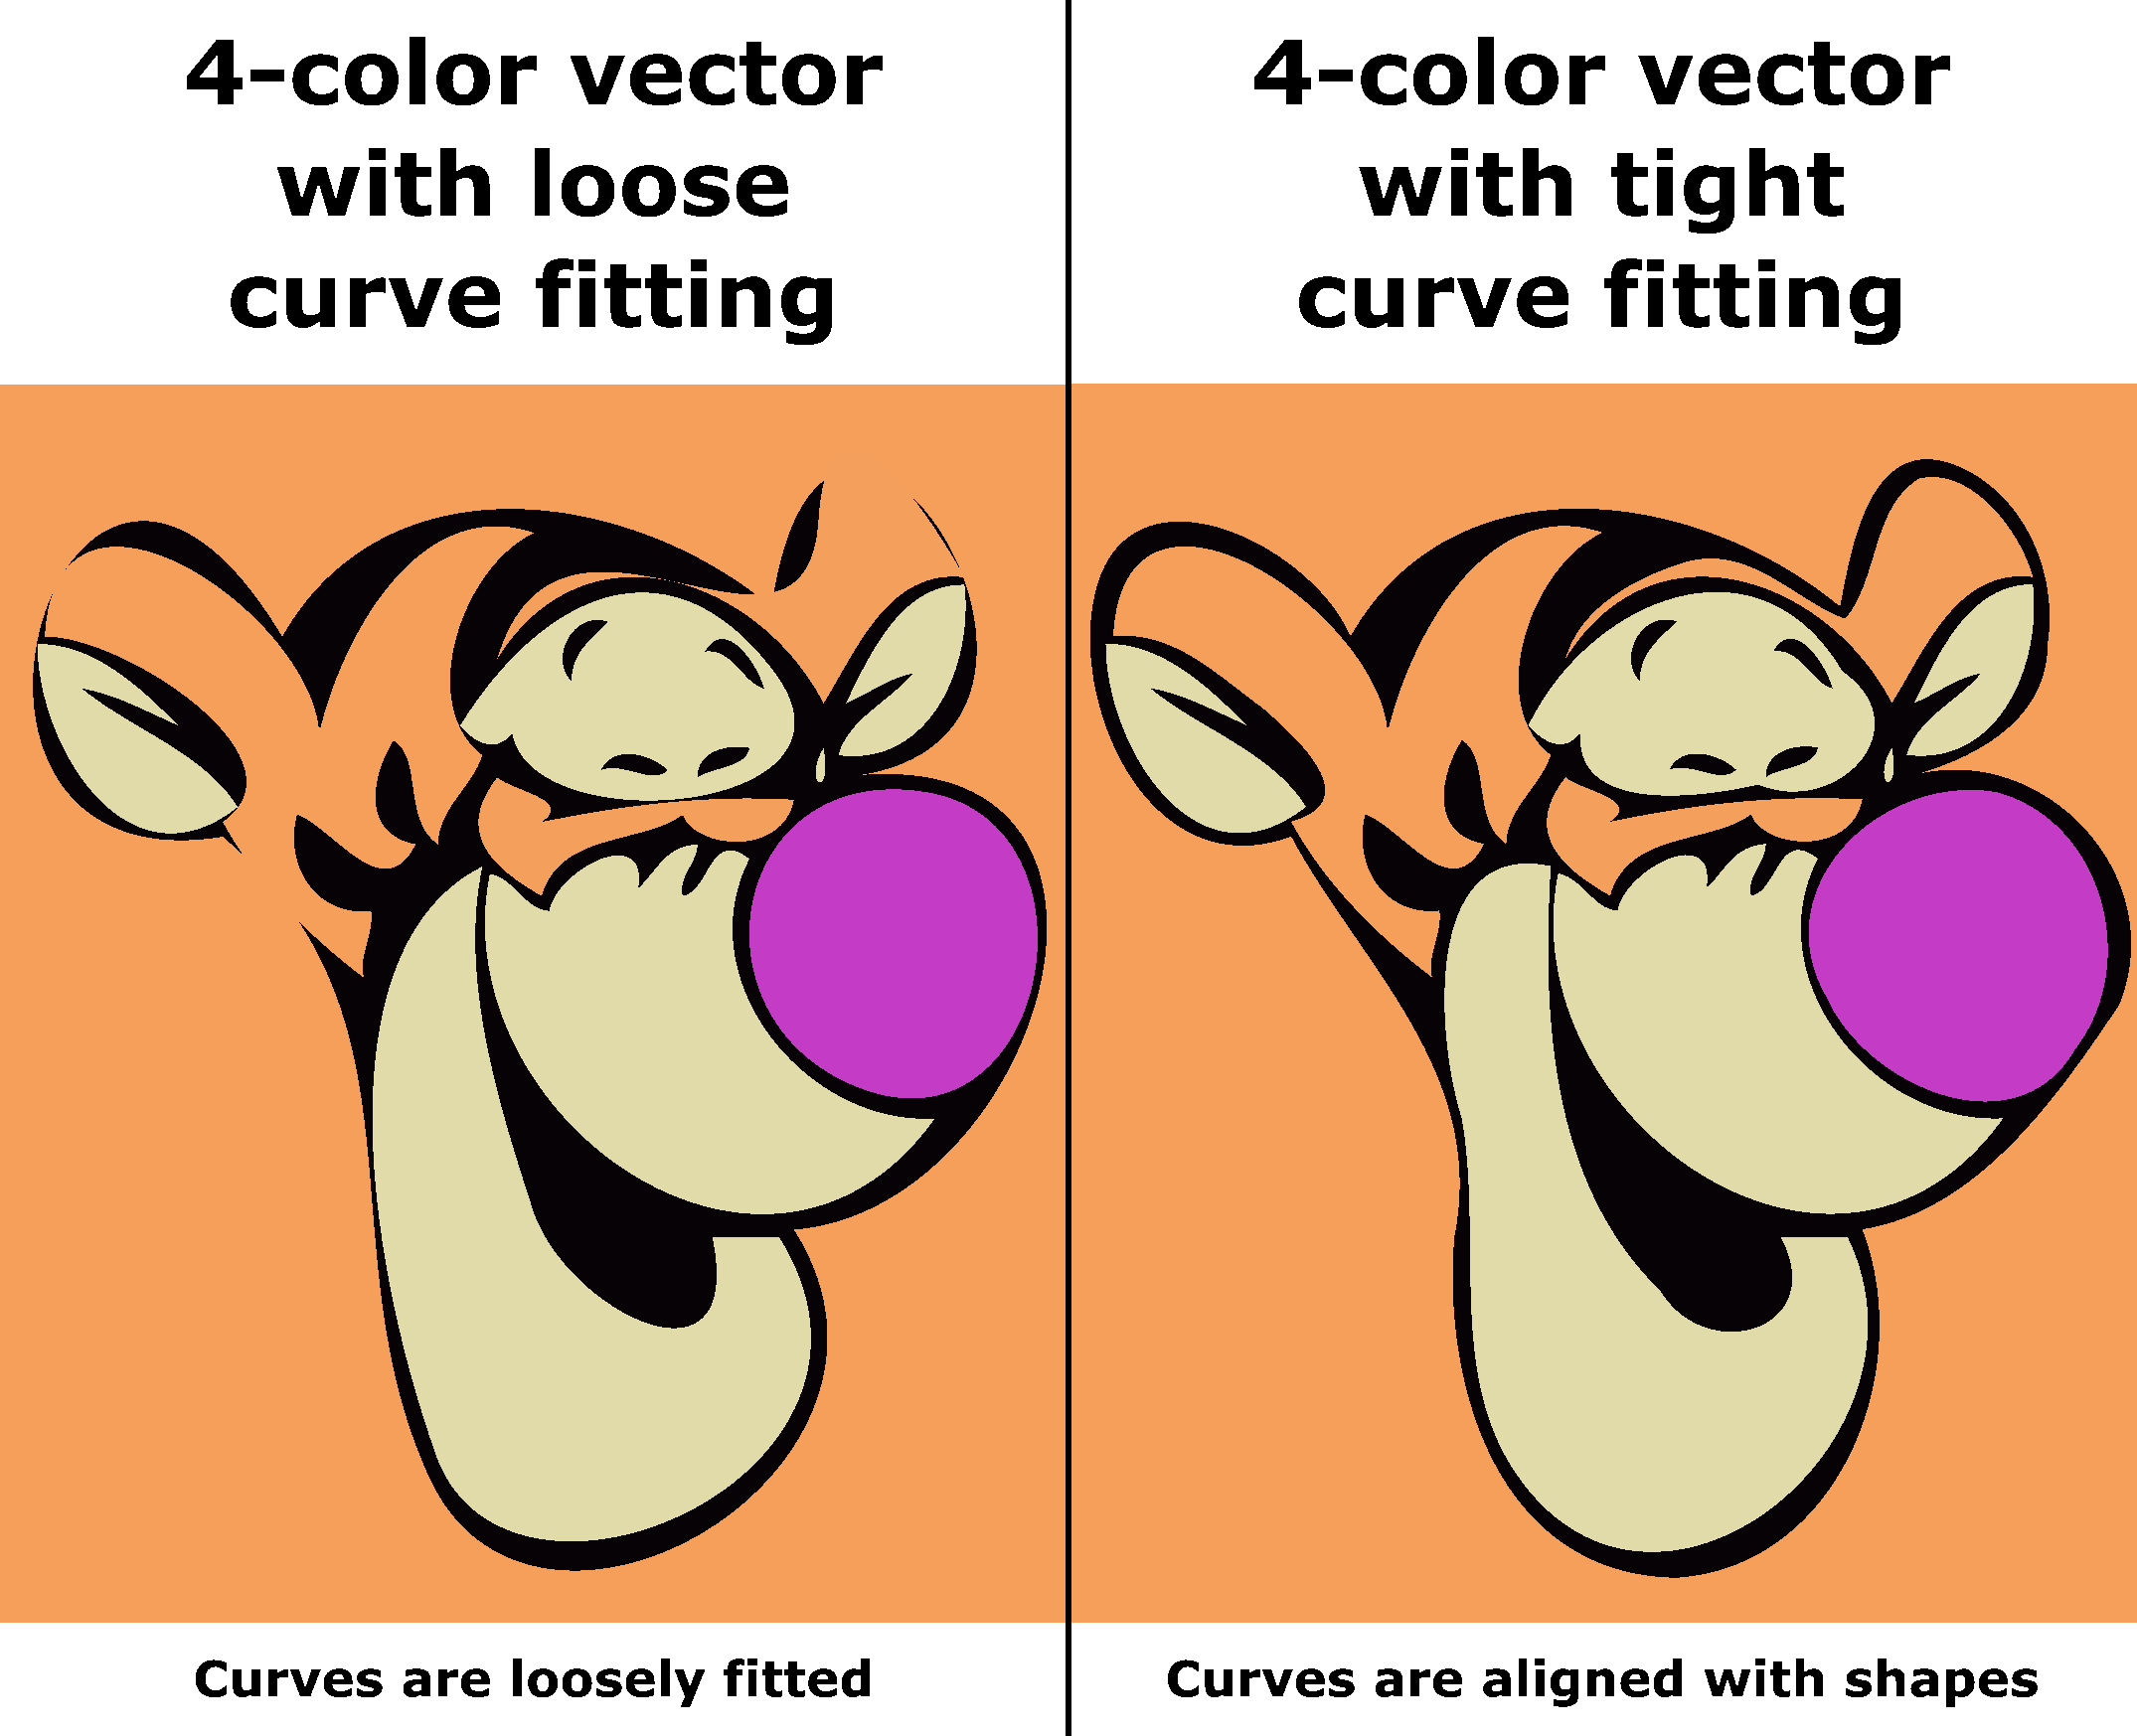
Curve fitting
The tight curve fitting generates the vector with curves more closely aligned with the raster image, while the loose curve fitting gives the vector with curves relaxed. The loose curve fitting may distort the figure, like in the below example.
Layer type
"Stack" gives a multi-layer vector: elements are placed on one another, like a stack. On the other hand, the elements in "Unstack" are created such that they are edge-to-edge to one another—see the image below.
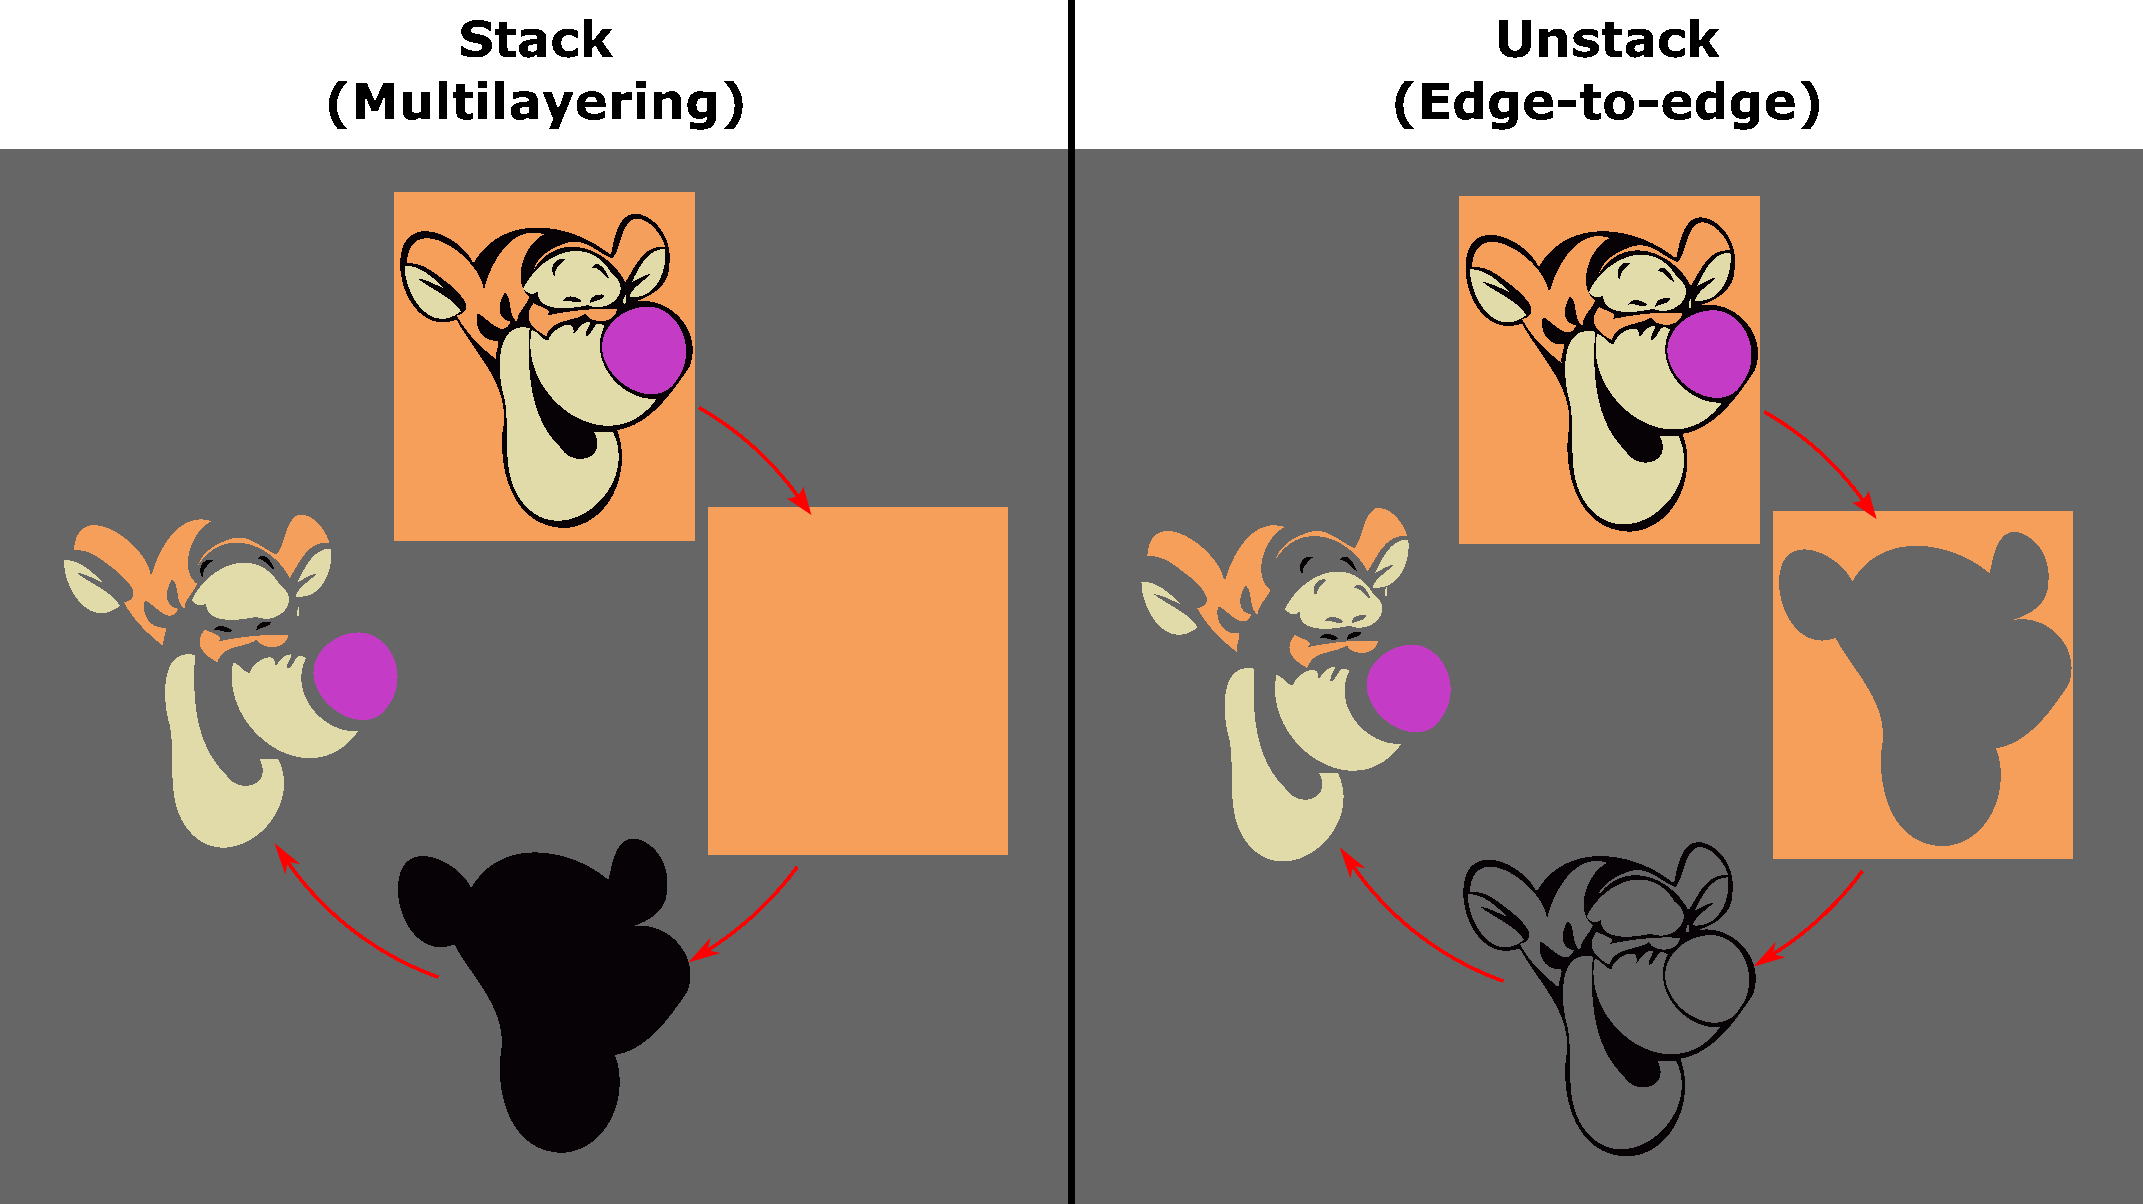
Stroke only gives the outline of each element.
White lines
White lines are caused by rendering. In a vector where two vector elements are touching edge-to-edge, we see thin white lines automatically appear between the edges when displaying the vector on a digital screen. SVGConverter reduces such issues by adding extra elements beneath the vector. But this addition does not affect the vector in any way other than its storage size on the computer. You can turn it off if you wish.
Vector file formats
After vectorization, you can download the vector in the following format: SVG, AI, EPS, and PDF.
EPS does not support transparency; the rest do.