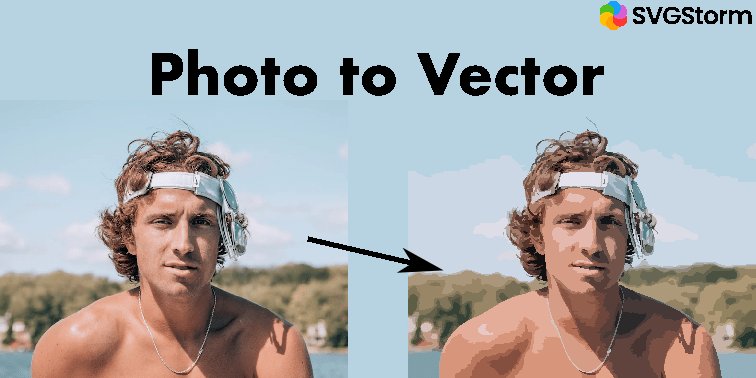
How to turn photo to vector free online?
Vector graphics are digital images that are made up of mathematical equations rather than pixels, and they can be scaled to any size without losing quality. They are often used for logos, icons, and other graphic design elements that need to be resized or printed at high resolutions.
If you have a pixel-based image, such as a photograph, and you want to turn it into a vector image, there are several methods you can try.
In this article, we will explore the different ways to convert a photo to a vector image using vector graphics software such as Adobe Illustrator and Inkscape and also explore new online tools, like SVGConverter.
We will also compare the difference between the vector produced by SVGConverter and traditional software, like Inkscape or Adobe Illustrator.
Before we begin, it's important to note that converting a photo to a vector image is a time-consuming process. Further it requires a certain level of skill and experience with vector graphics software.
If you do not want to go through the pain of reading this article and lack skills to use Illustrator or Inkscape, go straight to svgconverter.app/free and upload your photo image and click the vectorize button. Done! Your photo is converted into a vector.
With that in mind, let's take a look at the different methods you can use to turn a photo into a vector image.
Method 1: Using the Trace Tool (Adobe Illustrator or Inkscape)
One of the most traditional methods for converting a photo to a vector image is to use the "Trace" or "Live Trace" tool in a vector graphics software. This tool analyzes the colors and shapes in the original image and creates a group of vector shapes that approximate those colors and shapes.
To use the Trace tool in Adobe Illustrator, follow these steps:
- Open the photo in Illustrator.
- Go to the "Object" menu and select "Live Trace" or "Trace."
- In the Trace Options panel, choose the preset that best matches the complexity of the original image. For example, if the image has a lot of fine details and subtle gradations, you may want to choose the "High Fidelity Photo" preset.
- Click "Trace" to start the process. Illustrator will generate a preview of the vector image in the document window.
- Adjust the settings in the Trace Options panel to fine-tune the vector image. You can adjust the number of colors, the level of detail, and the smoothness of the curves.
- When you are satisfied with the results, click "Expand" to turn the trace into a group of vector shapes.
To use the Trace tool in Inkscape, follow these steps:
- Open the photo in Inkscape.
- Go to the "Path" menu and select "Trace Bitmap."
- In the Trace Bitmap window, choose the preset that best matches the complexity of the original image. For example, if the image has a lot of fine details and subtle gradations, you may want to choose the "Colors" or "Bright Colors" preset.
- Click "Update" to generate a preview of the vector image in the document window.
- Adjust the settings in the Trace Bitmap window to fine-tune the vector image. You can adjust the number of colors, the level of detail, and the smoothness of the curves.
- When you are satisfied with the results, click "OK" to turn the trace into a group of vector shapes.
Method 2: Using the Pen Tool (Adobe Illustrator or Inkscape)
Another method for converting a photo to a vector image is to use the Pen tool in a vector graphics software. This method involves manually drawing a path over the outlines of the shapes in the original image, creating a vector version of the image one line at a time.
This is a boring and very time-consuming method.
Method 3: Using a Standalone Vectorization Tool (SVGConverter)
If you don't have access to a vector graphics software, or if you don't feel comfortable using the Pen or Trace tools, you can try using a standalone vectorization tool. These tools are designed specifically for converting pixel-based images into vector graphics, and they often have a more user-friendly interface than vector graphics software.
Some popular standalone vectorization tools include svgconverter.app, VectorMagic, AutoTrace, Vectorizer.io etc. These tools work by analyzing the colors and shapes in the original image and creating a vector version of the image using a variety of algorithms and techniques.
Of the above, only SVGConverter is free and offers premium quality vectors in SVG, AI, EPS, and PDF format. The rest are paid.
You do not require any skills to use SVGConverter plus it is free and available online.
To use standalone vectorization with SVGConverter, follow these steps:
- Go to https://svgconverter.app/free and open the photo in the online appl.
- Choose the detailing level from high to low depending upon subtlety in the original photos.
- Click "Vectorize" or "Convert" to start the process. SVGConverter will generate a preview of the vector image in the right canvas.
- You can adjust the settings and experiment with other options in the program to fine-tune the vector image. Moreover, you can adjust the number of colors, the curve fitting, and the smoothness of the curves.
- When you are satisfied with the results, save the vector image in a format that is compatible with your vector graphics software (for example AI, EPS or SVG).
Method 4: Using a Vector Graphic Service
If you don't have the time or expertise to convert a photo to a vector image yourself, you can use a vector graphic service to do it for you. These services are usually staffed by professional graphic designers who can turn your photo into a high-quality vector image in a matter of hours or days.
To use a vector graphic service, follow these steps:
- Search online for a vector graphic service that fits your needs and budget.
- Upload your photo to the service's website.
- Provide any additional instructions or preferences that you have for the vector image.
- Pay for the service. The price will vary depending on the complexity of the original image and the level of detail you require in the vector image.
- Wait for the service to complete the conversion process. You will usually receive an email notification when the vector image is ready for download.
- Download the vector image and open it in your vector graphics software.
Comparison among Inkscape, Adobe, and SVGConverter
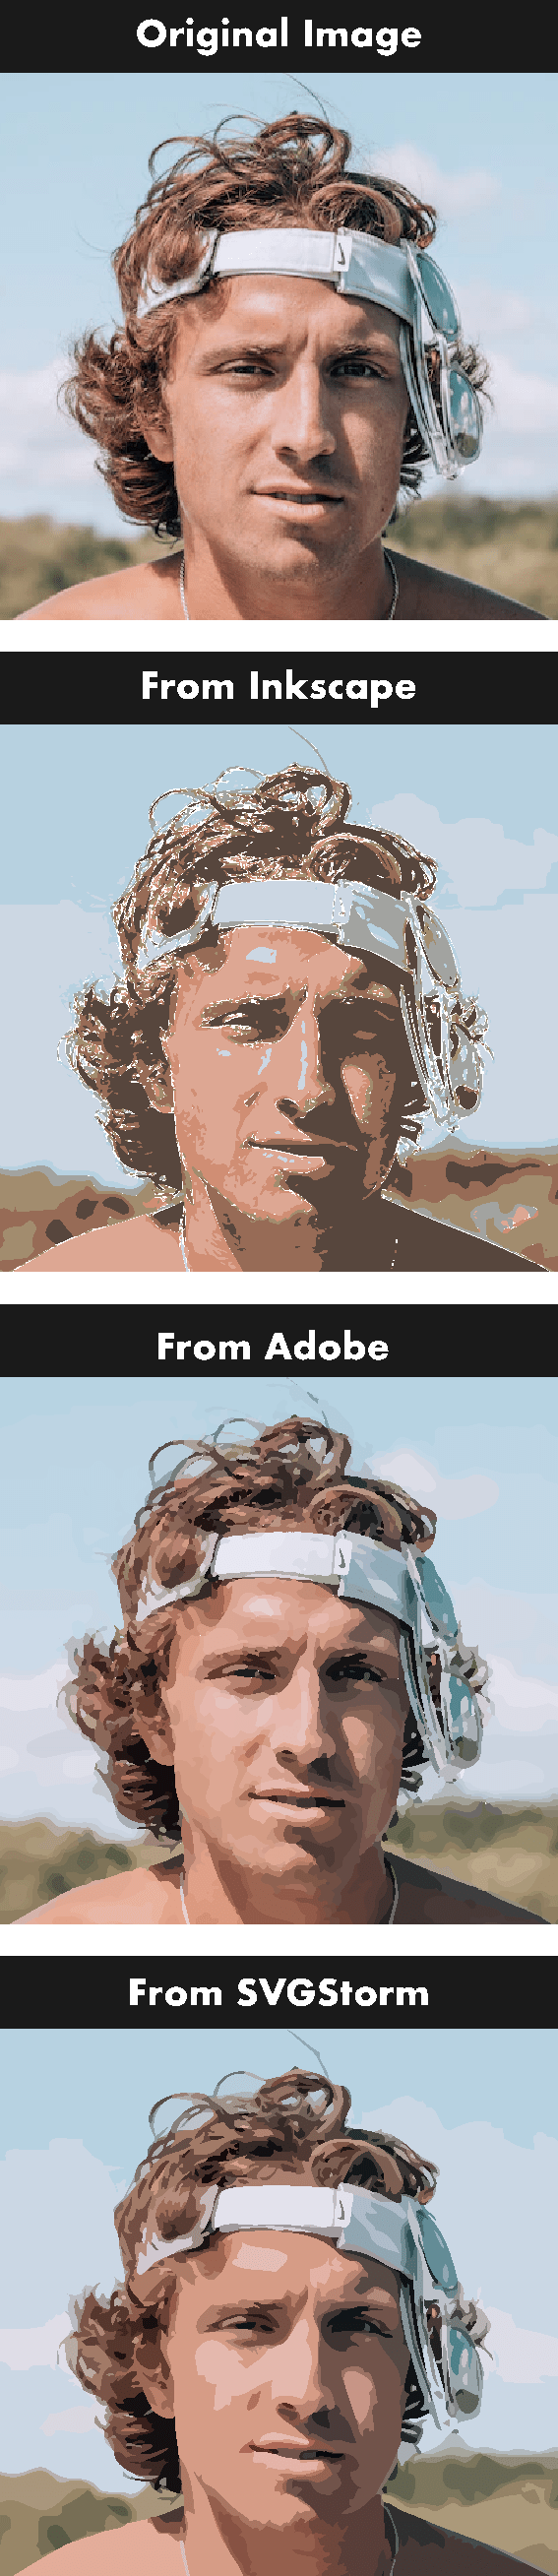
(From top to bottom: original raster image, Inkscape vector, Adobe Express vector, and SVGConverter Vector)
As we see, Inkscape gives the worst result. On the other hand, Adobe produces the vector with unnecessary vector objects. The vector produced by Adobe contains too many small objects that are similar in color; it's more like a small clump of elements with similar color groups together. Thus, it does not look like a vector. SVGConverter removes unnecessary elements and optimizes the number of shapes in the graphic to produce a smooth vector.
SVGConverter vectorizes photos to give optimized vectors, so you import the vector in any vector graphic software and continue editing further.